Kitchen Creations

Saturday, December 31, 2011

Comfort & Peace

This is my "does everything" bread recipe. You can use it to make loaves of bread, rolls in various forms and best of all... cinnamon rolls. It's from my mom and it's what bread has meant to me my whole life.  When we made bread, this is what we made, every Thanksgiving, Christmas, Easter and every special event in between.  Our family's favorite use for this bread dough was cinnamon rolls.  They are fantastic, as many of my friends will attest to; I'm thinking of a certain red-haired music minister and his soon-to-be-wife as I write this post.  In my own family they have become a Christmas morning tradition.  This year, Christmas was riddled with illness, so I'm a little late in making them.  Better late than never though and my house smells absolutely amazing at the moment.  There is something so utterly peaceful and comfort-filled in the act of making home-made bread.  From the time it takes to rise -you can't rush it and knowing that you've set aside time to focus on this is calming - to the kneading of the dough, my mind and my body calm and focus on all that's important in my life.  It's as if I've gotten back to an elemental state.  I think this is why I've loved having a garden this year and making food from scratch.  It's slower paced, it's full of thought and patience, it takes you back to memories of family and it brings your family in to help, to watch, to enjoy. 

Take a moment to step out of the frenetic pace of life and let peace and comfort rise up in you with this delicious bread.

***A tip:  Kneading the dough is crucial.  The more time spent kneading, the better and lighter your bread will be.  It's also one of the best parts of making bread, so don't skimp on it!


Ingredients:
1 cup sugar
4 cups milk
1 cup shortening
8 cups flour (I use whole wheat)
2 pkgs. of yeast (dissolve in 1/4 cup water & 1 tsp. sugar)
1 cup flour
1 tsp. baking soda
1 tsp. baking powder
3/4 tsp. salt
***For Cinnamon Rolls
butter
brown sugar
cinnamon

Method:
1.) Heat sugar, milk & shortening, until melted & sugar is dissolved.
2.)  When mixture is cool, add 8 cups of flour & yeast
3.)  Let rise until dough doubles in size
4.)  Mix together the remaining 4 ingredients (flour, baking soda, baking powder & salt)
5.)  Punch down dough and add the flour/soda/powder/salt mixture.
6.)  Knead and shape into desired shapes (loaf, rolls or cinnamon rolls)
****For cinnamon rolls:  Take a ball of dough and roll out to about 1/2 inch thickness, spread melted butter over rolled out dough, sprinkle brown sugar & cinnamon over it (also delicious to add nutmeg, ginger &/or cloves to this mixture!).  Once butter, brown sugar & spices are spread over the rolled out dough, roll dough up into a long log.  Cut into desired size slice and place face up in a baking dish.  Make sure you leave enough room between the rolls in order for them to rise. 
7.)  Let dough rise again (proofing)
6.)  Bake at 350 degrees until bread sounds hollow when tapped with a finger.

Thursday, December 29, 2011

Follow Your Heart

When I asked my friend Shannon how she made Taco Soup, a deliciously enticing soup I'd been hearing about in our church for a few months, she gave me a few main ingredients and then laughed and said, "Just follow your heart!".  I loved that statement and the sentiment behind it.  The best things I've concocted in the kitchen often come from following my heart and pouring not only great ingredients into the dish, but also my love; love for the food I'm cooking and love for my family.  So on Christmas Eve, when time was crunched and I wanted a meal that we could sit down together and enjoy, I took Shannon's advice and followed my heart to this amazing tasting and wholly satisfying soup.  You can use the recipe below as a general guide, but take my friend Shannon's advice and go with those ingredients in your cupboards that make your heart sing!

Make some hearts, and mouths happy tonight in your home!

Taco Soup   
Ingredients:
1 lb. ground turkey (or meat of your choice)
1 medium sweet onion, chopped
2 cloves garlic, minced
1/4 cup taco seasoning (or 1 packet)
2 tsp. Mexican chili powder
2 tsp. ground cumin
2 cans (or 4 cups cooked) beans (I used red kidney & black beans)
1 can (or 2 cups frozen) corn
1 20 ounce can of tomato product (I used crushed, but you can used chopped or stewed for the flavor and consistency you'd like best).
2 cups of broth (chicken or vegetable) - I used this to thin out the crushed tomotoes and make the soup less "chili" like.

Method:
1.)  Brown the ground turkey in 1 Tbsp of olive oil.
2.)  When meat is mostly browned, add onions and saute until tender.
3.)  Add garlic and saute for 1 minute more
4.)  Stir in taco seasoning and spices
5.)  Add beans and corn, mix well
6.)  Add crushed tomatoes & broth.
7.)  Bring to a boil
8.)  Serve & garnish with shredded lettuce, grated cheese, sliced green onions, sour cream & tortilla chips - basically anything you love on tacos tastes fantastic on this soup!

Click here for printable version

Tuesday, December 20, 2011

Cinderella's Soup

I've had this recipe since high school, when I visited Germany for a month.  My host mother made this soup and I loved it so much that she gave me the recipe.  It took a bit of time for us to figure out amount conversions and English names for certain ingredients, namely the boullion, but we did it!  I've always thought of this as "Cinderella's Soup" because of the name.  We often have this on Christmas or New Year's Eve.  It's a hearty and flavorful soup that satisfies on a cold evening.

This is another simple recipe, but with HUGE flavor.  I hope you enjoy it, anytime of the day!

Mittenacht Suppe (Midnight Soup)
Ingredients:
Pat of butter or olive oil
2 lbs. chicken tenders, cooked & cubed
3 bunches of green onions, sliced
2 cloves garlic, minced
1 8 ounce can tomato paste
1 green bell pepper, chopped
1 can kidney or black beans, drained
1 cup red wine
2 chicken boullion cubes (I've also used 1 - 2 cups of chicken or vegetable stock here for a thinner soup).

Method:
1.)  Brown onions, pepper & garlic in a pat of butter.
2.)  In a large soup pot, mix beans with tomato paste.
3.)  Add all other ingredients.
4.)  Simmer for 20 minutes.
5.)  Garnish with sour cream if desired.


Click here for printable version

Winner, Winner, Chickpea Dinner!

When my husband decided he wanted to change his diet to "mostly meatless", I scoured cookbooks and the internet for recipes that sounded like they would be filling and delicious as well as vegetarian.  I found this very simple recipe in my "Express Lane Meals" cookbook by Rachael Ray.  I love her and I love meals that you can make quickly!    The chickpeas (garbanzo beans) in this sauce make it very creamy and filling.  My youngest, who can be very hard to please when it comes to dinner, scrapes his plate clean after this meal. 

Enjoy a "Roman Holiday" tonight with your family!

Spaghetti alla Ceci
"Spaghetti with Chickpeas"
Ingredients: 
Salt
1 pound spaghetti (I also like to use whole wheat penne pasta)
3 Tbsp extra virgin olive oil
1/2 tsp red pepper flakes (I cut this in half for my little guy's sake)
3-4 garlic cloves, finely chopped or minced
1 14- ounce can of chickpeas, drained
1/2 tsp. dried thyme
Black pepper (to taste)
1/2 cup dry white wine or chicken/vegetable stock
1  14-ounce can crushed tomoatos
Grated Parmesan cheese.

Method:
In a large pot, bring water for pasta to boil.  Salt the water & cook the spaghetti according to box directions.
While the spaghetti cooks, heat olive oil in a  large skillet.  Add the red pepper flakes & garlic.
Place the chickpeas in a food processor & pulse until finely chopped.
Add the chickpeas to the skillet with the garlic & season them with thyme, salt & pepper.
Saute them for 3-4 minutes.
Add the wine or stock & cook down for about 30 seconds, then stir in the tomoatoes.
Drain the pasta & toss with the sauce.
Sprinkle with grated Parmesan cheese
ENJOY!

Click here for printable recipe

Monday, December 19, 2011

An Apple A Day

On Saturday our family took a quick trip over to Johnson's Orchard, one of our favorite places in Yakima.  I can't tell you how much I adore going there when the air is crisp and cold and I can choose from over 8 different kinds of apples and 5-6 different kinds of pears.  My youngest son and I enjoy filling a box with every kind we can find to bring home and try.  When we got home, we couldn't wait to sample some of that crisp and juicy fruit we'd just chosen and I decided that it was time for another of our favorite fall recipes found in the Gooseberry Patch, "Flavors of Fall" cookbook (and ammended only slightly by me).  This one is super simple but oh so satisfying!!!  I was just telling my friend Shannon about it.  One of the best parts is the delicious "glaze" that is leftover in the pan.  So be sure you volunteer to do dishes that night!  You won't mind scraping the pan this time, you might even find yourself licking it clean - it's that good - I promise!!!

Sausage n' Apples
Ingredients:
1 lb. pkg of sausage (I have used links, sliced polish sausage & ground sausage.  ALL are good.  The best flavor comes from ground sausage, although the final presentation is less aesthetically pleasing than sausage links or sliced polish sausage.)
6 medium apples, cored, peeled & sliced
1 sweet onion, thinly sliced (optional, but it really adds great flavor & you don't notice it's there once it all cooks down).
1/2 cup sugar (I like using brown, but white is just fine too)
1/2 tsp. cinnamon
1/2 tsp. vanilla extract
1/2 tsp. nutmeg
1/2 cup water

Method:
Brown sausage in a large skillet, add onions and saute until translucent (about 5 min.).  Mix apples, sugar & spices and water together and add to skillet.  Cover and simmer until apples are tender, about 30 minutes.  It serves 4, just barely, so I'd advise doubling it if you have more than that!

Saturday, December 17, 2011

"Chai" adding a little spice to your life!

My husband and my friend Anna adore Chai tea and I'm quite partial to it myself.  When looking for a recipe to make for our recent small group gathering, I found one for Chai Gingerbread bars on the Tasty Kitchen food blog.  These bars smell absolutely heavenly while cooking! My boys could not stay away from the kitchen, asking every few minutes if they were ready to taste. 

A few hints, when you spread the batter in the pan it will not look like it's enough, but as the recipe assured, it most certainly is.  The flavor of the chai is fairly mild and is far more pronounced when the bars are cold, although they are very tasty warm out of the oven too.  I think I will double the Chai spice in my next batch because we like spice in our family!

"Chai" spicing up winter with this delicious treat!

Chai Gingerbread Bars 
Recipe adapted from Tasty Kitchen food blogIngredients:
2 cups Whole Wheat Flour
1 tsp. Cinnamon
½ tsp. Ground Nutmeg
1-2 tsp. Chai Tea Leaves (Orginal recipe calls for 1 tsp, which is one tea bag full.  We like more spice so use 2 tsp.)
½ tsp. Ground Cloves
1 tsp. Ground Ginger
½ tsp. Baking soda
1 cup Butter, softened
¾ cup Brown Sugar
½ cup White Sugar
2 Large Eggs
1 tsp. Vanilla
1 Tbsp. Fresh Grated Ginger

Method:
* Preheat oven to 350 degrees & prepare a 9X13 inch baking pan with either butter or cooking spray.
* Combine flour and spices in a large bowl, mix 
   well.
* Beat butter and sugars together until soft 
* Add eggs one at a time, mix well. 
* Add in vanilla & grated ginger.  
* Mix ingredients on low, adding the flour mixture
   until flour is blended in.
* Scoop the batter into the prepared pan. 
* Spread it out evenly. 
 (It won’t look like enough batter, but it is, don’t 
 worry!)
* Using a greased spatula (b/c the batter is very
  sticky), smooth the batter out evenly.
* Sprinkle the top with white sugar
  (this is optional, but it adds a nice texture
  contrast & looks very pretty)
* Bake for 25-30 minutes, until a toothpick inserted in the middle comes out clean.
* Cool completely before cutting.
These bars are great while warm, but seriously amazing when cold!!!

Wednesday, December 14, 2011

Getting Back To Your Roots

This soup caught my eye immediately as I looked through my "Complete Vegetarian" (published by Hermes House) cookbook.  It is an absolutely gorgeous looking soup and the ingredients shout warmth and comfort!  Honestly, I would've been happy eating the roasted vegetables just by themselves!  They were absolutely incredble, flavor-wise.  The original recipe encourages you to use other root vegetable and adapt the quantities you put into the soup.  Well, I change recipes up all the time and if the recipe encourages it then all the more reason to experiment!  I have used both butternut squash and sweet potatoes as the base for this soup and our family has enjoyed the flavor of both.

So, get back to your roots with me and enjoy a hot and hearty meal with your family!

Ingredients:
1/4 cup oilive oil
1 medium butternut squash or 3 medium sweet potatoes
2 carrots, sliced
1 large parsnip
2 leeks, thickly sliced (after slicing leeks, place in a bowl of cold water and allow dirt to fall to the bottom of the bowl, then scoop leeks out with slotted spoon)
1 onion, quartered
3 bay leaves
4 thyme sprigs
3 rosemary sprigs (I've used dried rosemary too)
5 cups vegetable stock
salt and freshly ground black pepper
Sour Cream to garnish

Method:
1.  Preheat oven to 400 degrees.  Combine olive oil and chopped vegetables in a large bowl, tossing until vegetables are coated with oil.
2.  Spread vegetables in a single layer on a baking sheets.  Tuck bay leaves, thyme and rosemary sprigs into vegetables.
3.  Roast for 50 minutes or until vegetables are tender.  Turn vegetables occasionally, ensuring browning on all sides.
4.  Remove from oven and discard herbs and transfer vegetables to a large saucepan.
5.  Pour the stock into the pan and bring to a boil.  Reduce the head and season to taste, then simmer for 20 minutes.
6.  For a smooth soup, transfer soup to food processor or blender and process for a few minutes until thick and smooth.  Also good left as is with large pieces of vegetables.
5.  Return soup to pan and heat through.  Season and serve with a garnish of sour cream.

Click here for printable version

Tuesday, December 13, 2011

It's Salsa Time!

This is another recipe from my great friend Regina, of the "To Die For Blueberry Muffins" fame.  I recently made this for a work Christmas party.  It's such a festive looking dish and combines some really great flavors. That's why I decided it should be next up for sharing.  That and I just wanted to continue the "dance party" with a spicy "salsa".  All "corniness" aside, this is a simple yet beautiful looking dish that really satisfies on so many levels, including the ever important "healthy choices" option! We love to eat it with some tortillas and rice for a full meal.

Keep on dancing with us and enjoy some of this delicious salsa!


Ingredients:
⅓ cup fresh lime juice
½ cup olive oil
1 clove minced garlic
1 tsp. salt
⅛ tsp. cayenne pepper
⅛ tsp cumin (I added this spice)
4 cups black beans   (also great with black eyed peas!)
1 ½ cups corn (frozen or fresh)
1 large avocado (diced)
1 red bell pepper (chopped)
2 medium tomatoes (chopped)
6 green onions (thinly sliced)
½ cup chopped fresh cilantro

Method:
1.) Place lime juice, olive oil, garlic, salt, cayenne pepper and cumin in a small jar.  Cover with the lid and shake until all ingredients are well mixed.
2.)  In a salad bowl, combine beans, corn avocado, bell pepper, tomato,green onion and cilantro.
3.)  Shake lime dressing again and pour over the bean mixture.  Stir to coat.
4.)  Serve with tacos, nachos, plain tortilla chips......

Click here for printable link

Monday, December 12, 2011

Come On Everybody and do the "ConGo"!!

This recipe comes from my mother-in-law, Conny.  Beyond just loving the name, I love making recipes from my youth or my husband's and sharing them with our children.  It's another way of passing on family history and love, in my mind anyway.  I find that sharing in the baking, aroma and eating of an old favorite can conjure up memories of times past like almost nothing else.  My boys love it.  I mean who wouldn't? Listening to old funny stories AND eating delicious treats!  There is nothing like the warmth of a kitchen, aroma of baked yumminess and time with each other to strengthen the bonds of family!  Well, except maybe for a family dance party!

Come on and "ConGo" with us!

Congo Squares   
Ingredients:
2 3/4 cups flour
2 1/2 tsp. baking powder
1/2 tsp. salt
2/3 cup shortening or butter
3 eggs
1 cup chopped nuts (optional, I never put them in.  I don't like nuts or raisins in baked goods).
1 pakage chocolate chips
2 1/2 cups brown sugar (you could probably use less, they are quite sweet)

Method:
1.  Cream together butter/shortening & sugar.
2.  Add eggs, 1 at a time.
3.  Sift together dry ingredients (flour, baking powder & salt)
4.  Add sifted dry ingredients to butter mixture.
5.  Fold in chocolate chips and nuts (if desired)
6.  Spread in a 10 X 15 pan and bake at 350 for 30 - 40 minutes.

Click here for printable recipe

Sunday, December 11, 2011

Handed Down 3 Generations and Counting!

I'd never heard of Harvey Wallbanger before I met my husband.  I never knew it was a mixed drink and I certainly didn't know it was a delicious cake!  This recipe mixes the ingredients from the famous drink with ingredients for cake to create a magnificent mixture of texture and flavor.  It's a very easy cake to make and tastes like you must have spent a great deal of time on it.  In fact, my older son has been helping me make it since he was about 2 years old.  

The recipe I'm about to share is a very special one.  As I type this I am looking his grandmother's worn recipe card that contains the instructions for creating it.  It's written in the hand of my husband's grandfather and is his first choice of birthday cakes, always.  So today, I'm making this in honor of my husband and his life and in loving memory of his wonderful grandmother Jeanette. 

It's a family favorite and has been for 3 generations, and counting!

Harvey Wallbanger Cake  
Ingredients:
1 package yellow cake mix
1 package instant vanilla pudding (3 3/4 ounce)
1 cup of liquid shortening (also known as oil )
4 eggs
1/4 cup Vodka
1/4 cup Galliano (a sweet herbal liqueur)
3/4 cup orange juice
Powdered Sugar (for dusting cake after baking)

Method:
1.  Mix all ingredients and beat 4 minutes
2.  Pour batter into a well greased and lightly floured Bundt pan
3.  Bake at 350 degrees for 45-50 minutes.
4.  Let cook on rack for 30 minutes
5.  Turn upside down on plate or platter
6.  Dust with powdered sugar

Click here for printable link

Saturday, December 10, 2011

Christmas Movie Nights Begin!

Four years ago, we started a tradition in our family (actually we copied some friends and added our own little twists) and we call it Christmas movie nights.  Beginning the first Friday in December we watch old Christmas classics, like White Christmas, Shop Around the Corner and The Bishop's Wife while testing out new Christmas treats and deciding whether they rate high enough to be considered a Buegge family Christmas tradition.  For me this combines two great loves, old movies (and by old, I mean black and white, MAYBE technicolor) and trying out new baking recipes!!  It doesn't feel like we've rung in the season until these nights begin.  We had a slower start this year and had our first official "movie night" last night.  I played it safe with a tried and true favorite, Pumpkin Bars, and then as tradition mandates a new recipe, Cranberry Orange Bread.  I love these flavors together and this bread didn't disappoint. 

You'll find lots of recipes for this combination  bread, I've taken a few and combined them into one that we loved.  We hope you love it too!

Cranberry Orange Bread      
Ingredients:
2 cups flour (I used white whole wheat and it was very tasty!)
3/4 cup of sugar
1 1/2 tsp. baking powder
1 tsp. baking soda
1/2 tsp. salt
1 large egg
3/4 cup orange juice
zest of 1 orange (less if you like a more mellow orange flavor)
2 Tbsp. melted butter
1 Tbsp. vanilla
1 cup fresh or frozen cranberries (I used a bit more, 1 1/4 cup b/c I really like them.)

Method:
1.  Combine all dry ingredients (flour, sugar, baking powder, baking soda and salt) in a large mixing bowl.
2.  In a separate bowl, stir together egg, orange juice, orange zest, melted butter and vanilla.
3.  Add egg/orange juice mixture to flour mixture and mix.  Combine until dry ingredients are just moistened
     by wet to achieve best bread texture.  Over mixed batter becomes hard and chewy.
4.  Fold in cranberries.
5.  Pour into a greased loaf pan and bake at 325 degrees for about 60-75 minutes, or until toothpick inserted
     in middle comes out clean. 
6.  Cool for 10 minutes before trying to remove from loaf pan.

Click here for printable version

Friday, November 25, 2011

Ode to "Joy" and Fellowship in the Valley

Well it's the Friday after Thanksgiving and I will admit to feeling like we dodged a huge bullet.  We made it through last night and none of the rest of us have been struck down by the illness that had my younger son up all night Wednesday night.  Yes this meant that we were unable to travel to spend Thanksgiving with our wonderful cousins and grandparents.  This was a hard pill to swallow.  However, our family was remarkably bright eyed (particularly remarkable for the two of us who'd been up all night) and able to find so many things in our lives to be thankful for.  Then, as if to reward us for this positive upbeat attitude, God showered us with the most amazing Thanksgiving gift.  Our wonderful friend Joy called to say she had some extra turkey and a pumpkin pie she wanted to bring by since she knew we had not planned or shopped for a meal here.  In fact we had very little in the house because we'd planned to be out of town for the next 4 days.  We were overwhelmed with gratitude.  A sick little boy, a tired mommy and daddy and a very disappointed 8 year old who was trying to be as thankful as his little heart could muster in the face of not spending a few days with beloved cousins.  We were by no means helpless but this meant the world to us to be thought of and cared for.  Not only did Joy bring us turkey and pie, she brought the fixings for an ENTIRE Thanksgiving meal.  When I saw it all on my counter, I completely broke down in tears. Yes, I was very tired, but I also felt so loved and cared for.  It was yet another example of the family God had built around us here in Yakima since we'd moved here a little over a year ago. It was a leap of faith and we knew God had orchestrated this move and we were excited about it, despite leaving home and family and friends behind us.  He led us here, to a job that my husband loves and that makes him more joyful than I've seen him in years, friends and neighbors that have made life a joy, to a church that has epitomized the life we want to live, a slower paced life that focuses on relationships and building the community around us, and to a FAMILY that loves us completely.  Our church family and friends have never let us feel alone here, in the many moments we've started to long for connections they've been there.  They visited the hospital to provide company, support, and even gifts for Levi when he was hospitalized 6 months after moving here, meals when we came home,  invitations into homes in case weather prevented us from spending holidays with blood family, countless invitations into homes on a regular basis to enjoy time together and now a full Thanksgiving meal brought to our doorstep by our very own Thanksgiving angel.  We are blessed beyond measure by the bounty God has provided for us, not in material things, but in relationships and love here "In the land of apples and hops".

Wednesday, November 23, 2011

Upside-down or right-side-up, either way it's delicious!

We have some amazingly delicious, ripe and juicy pears sitting on our counter.  I walked past them a few days ago and the aroma made my tummy grumble and my mouth water.  It was watering for this fabulous dessert found a few years ago in a beloved cookbook, The Family Circle Cookbook.  This book has pictures of every single item in it.  That's what always lures me in, the picture.  That's why I've committed to always having a picture of what I post here and that picture will ALWAYS be of the foods I've baked or cooked.  Pictures really are worth a thousand words.  It made me wonder then, how many words are "tastes" worth?  I'd say at least 10 times that!!!

So try this winter dessert and let the loquaciousness begin!!!

Pear-Cranberry Upside-Down Cake 
Ingredients:
Topping
6 Tbsp. unsalted butter
½ cup firmly packed dark brown sugar
3 ripe pears, peeled, seeded & cut into halves or quarters
1 cup fresh or frozen cranberries
Cake:
1 ½ cups all-purpose flour
¾ cup granulated sugar
2 tsp. baking powder
½ tsp. salt
⅔ cup milk
⅓ cup unsalted butter, at room temp.
1 egg
1 tsp. vanilla

Method:
Preheat oven to 350 degrees
Topping: Place butter in 9X9X2 inch square baking pan.
Place pan with butter in oven until butter melts.
Stir in brown sugar.
Arrange pears, rounded side down over sugar mixture.
Sprinkle cranberries between pears.
Cake: Stir together flour, sugar, baking powder & salt in large bowl.
Beat in milk & butter until smoth
Beat in egg & vanilla until blended
Pour batter evening over fruit in baking pan.
Bake for 45-50 minutes, or until wooden toothpick inserted into the middle of the cake comes out clean.
Cool cake in pan on wire rack for 5 minutes
Loosen cake from sides of pan by sliding a knife around the edges.
Place serving platter on top of baking dish and invert, let the glaze drop down sides of cake.

For printable version click here.

Tuesday, November 22, 2011

It's the kissing that makes us the best!!

Yesterday my younger son wanted to bake something together and he chose this recipe.  He also wanted to pretend like we were having our own cooking show.  Can you tell Food Network is a favorite in our house?  We put on our aprons and he gave a running dialogue of each step, sometimes leaning over to ask what to say next.  At one point I leaned toward him and he leaned toward me and we smiled and gave each other a kiss.  The next thing I know, he's looking at the "audience" announcing that "We have kissing in our restaraunt and that's what makes it the best.".  He invited the audience to stop by, "Awesome Miners" (he named the restaraunt) any time and taste our delicous scones.  So anytime you are in the neighborhood, stop on in and we'll whip you up a batch! 


Spiced Cranberry-Orange Scones    
Ingredients:
1/2 cup chopped cranberries (fresh/frozen not dried)
1/4 cup + 2 Tbsp granulated sugar
2 cups flour (I do 1/2 white & 1/2 whole wheat)
2 tsp. baking powder
1/2 tsp. salt
1/2 tsp. cinnamon
1/4 tsp. nutmeg
1/4 tsp. ginger
1/2 cup butter (cut into 1/2" cubes)
2 large eggs
2 Tbsp. orange juice
1 tsp. vanilla extract
2 Tbsp. orange zest

Method:
Mix cranberries & 2 Tbsp of sugar
Mix together flour, baking powder, spices and salt
Cut butter into flour mix, until crumbly
Add flour mix to cranberries
Knead until evenly mixed.
Pat into 9" circle and cut into wedges
Bake at 325 for 20 minutes

For printable version click here.

Monday, November 21, 2011

Basic Comforts

When I set about doing this blog, I wanted to share the recipes that my family and I love most.  Those meals or treats that make you feel warm and loved.  Those recipes you return to time and time again.  Now that winter has shown up here in the northwest, those meals and treats seem more important than ever.  Who doesn't love coming in from the cold to the warmth and aroma of something wonderful  baking?  Yesterday was a gray day and the baking bug hit me in full force so I decided to make one of our all time favorite comfort foods, chicken pot pie.  This takes some time to make from scratch, but it's sooooo worth it.  My husband took his first bite and his eyes literally rolled back in his head.  His verbal reaction, "I just want to sit here and savor this bite for the next 30 minutes".  It made the constant battle I have with rolling out and transferring pie crust from counter top to pan, in its whole form, worth it. 

The crust recipe is from my mother-in-law.  It's the ONLY one I've ever experienced success with.  The rest, I made up as I went along, using my favorite flavor combinations.  I thought it might be nice to have a pot pie recipe on hand for some of those turkey leftovers this week.  Another great tip, learned from my mother-in-law - cinnamon pie crust swirls.  Using the leftover pie dough, roll it flat, spread with butter, sugar, cinnamon, nutmeg and ginger, or anything you like (I've used all kinds of fruit inside too!)  Roll the dough and cut into slices.  Bake until golden!  So yummy!!!

Get cooking and get comfortable!!!

Chicken Pot Pie     
Ingredients:
Crust
4 cups flour
1 1/2 cup shortening
1 1/2 tsp salt
1 tsp. baking powder
1 beaten egg
1/2 cup cold water
1 Tbsp. vinegar

Filling
3 Tbsp. Olive Oil
1 large onion, chopped
3 large carrots, sliced
4-5 celery ribs, sliced
2 cloves garlic, minced
1 1/2 cups corn
1/2 cup white wine
1/4 cup flour
1/4 cup broth
1 cup milk
1/4 cup sour cream (or add to milk amount)
2 lbs. chicken (or more if you like it meaty), cooked & diced to preferred size
1 1/2 tsp. sage
1 tsp. rosemary
1/2 tsp. thyme
1/2 tsp. salt
1/2 tsp. pepper

Method:
Crust
1.  Sift together, flour, salt & baking powder.
2.  Add shortening and cut in until dough is crumbly.
3.  Add 1 beaten egg, 1/2 cup cold water & 1 Tbsp. water.
4.  Mix until all ingredients are just blended (too much mixing/kneading will make your dough tough & heavy instead of light and flaky)

Filling
1.  Heat olive oil in large pan. 
2.  Add onions, carrots and celery, saute for 5 minutes
3.  Add garlic and saute for 1 minute more
4.  Add corn and saute for 1 minute more.
5.  Add flour and mix in well.
6.  Slowly add broth, milk and sour cream, stirring constantly while adding.
7.  Cook until liquid thickens (once it boils it's as thick as it will get)
9.  Add in cooked, diced chicken
10.  Add in sage, rosemary, thyme, salt & pepper, stir & simmer for a few more minutes
11.  Pour filling into a 9X13 inch baking dish.
12.  Roll out dough (about 3/4 of the dough) to preferred size to cover dish.
13.  Cover filling with dough and pinch edges.
14.  Bake at 375 degrees until golden on top (can brush with egg wash or milk for extra golden and crispy top) - about 30-40 minutes.

Here is a photo of the cinnamon pie dough swirls we love!!    


Enjoy!

For printable version click here.

Sunday, November 20, 2011

Pumpkin, pumpkin, who's got the pumpkin?

The answer......everyone this time of year!!!!  I love being able to get pumpkin for a decent price during Thanksgiving time.  Pumpkin bread has always been a favorite of mine and I wanted a recipe to call my own, so I went looking and found a recipe for pumpkin bars that had great reviews. I'm a total sucker for any recipe with "bar" in the title. I made my own substitutions and alterations and after several attempts came up with the one I stick with now.  These are delectable!!  It comes with a recipe for frosting.  The frosting definitely adds something special, but these bars are wonderful all by themselves.  You can also bake the batter in muffin tins for some great tasting muffins that freeze nicely!

Pumpkin Bars    
Ingredients:
4 eggs
1 1/2 cups sugar
1 cup vegetable oil
15 oz. pumpkin
2 cups flour (I use 1/2 white & 1/2 whole wheat)
2 tsp. baking powder
2 tsp. ground cinnamon
1/2 tsp. ginger
1/2 tsp. nutmeg
1 Tbsp. vanilla
1 tsp. salt
1 tsp baking soda
frosting:
8 oz. cream cheese
1/2 cup butter
2 cups confectioners sugar
1 tsp. vanilla


Method:
1.  Preheat oven to 350 degrees
2.  Mix eggs, sugar, oil & pumpkin until light and fluffy.
3.  Stir together remaining ingredients.
4.  Add dry ingredients to pumpkin mixture & mix until smooth.
5.  Spread into 13 X 10 pan (or 2 smaller pans)
6.  Bake 30 minutes & let cool
7.  Mix together frosting ingredients and spread over if desired.  It's fantastic without the frosting too!!
8.  Sprinkle a mixture of sugar, cinnamon & nutmeg over the top for a pretty finish

For printable version click here

Thursday, November 17, 2011

What do you do when it snows?

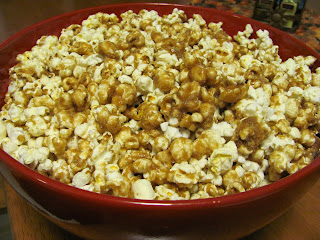
Yesterday was the very first snow fall of the season here in Yakima, Washington.  It was lovely to watch the giant flakes fall from the sky.  I was at work and couldn't help but smile at the kids as they shrieked their joy at finding snow on the playground.  I confess to feeling rather kid-like myself.  I stood in it for 10 minutes, just letting it fall around me and enjoying the peaceful quiet that seems to accompany snow.  After that, all I wanted to do was go home, make some hot tea, put on Christmas music and bake (especially after reading that my friend Austyn was doing just that)!  So as soon as contractually possible, I grabbed my stuff and my kids and headed for home.  On went Pandora and Christmas music and out came the recipe for carmel corn from my friend's mom.  What could be better than ending the evening of the first snow fall with carmel corn and the movie White Christmas?  Yes, maybe I'm jumping the gun for some of you out there, but it felt so right.  I was literally dancing about my house, unable to contain the joy inside.  It was contageous.  All my guys joined in the singing and cooking and ALL of us enjoyed a night by the fire watching a great Christmas classic.

May you be filled with some delicious carmel corn & winter joy yourself!!

Carmel Corn  (Recipe by Vicky Kehrer)
Ingredients:
1 cup butter
2 cups brown sugar
1/2 cup corn syrup
1/2 tsp. baking soda
1/2 tsp. salt
1/2 tsp vanilla

Method:
*  Melt butter in large saucepan.
*  Stir in sugar & syrup. 
*  Bring to a boil, boil for 5 minutes.
*  Stir occasionally.
*  Remove from heat.
*  Stir in salt, soda & vanilla
*  Pour mixture over popcorn.
*  Bake at 250 degrees for 1 hours, stirring every 15 mintues.
*  Cool on waxpaper

*** Warning!  This is definitely NOT health food, but it's oh so worth it!

Click here for printable version.

Tuesday, November 15, 2011

Recipes that make you smile

Do you have any of these?  Those recipes that you pull out and they instantly bring a smile to your face, maybe even a full blown grin?  This is one of those recipes for me.  My friend Regina made these muffins for my husband and I one morning while we were visiting.  They were so incredibly delicious!  When I needed a recipe for muffins to take to school a few months later, I immediately begged for her recipe.  She e-mailed it to me.  Somewhere in the transition from her recipe to my printed one, the ingredients for the crumb topping were altered a bit.  The amount of butter went from 1/4 cup to 1 cup.  Let me tell you, that slash and the 4 that follows it are extremely important to the final outcome of these muffins!!!  The muffins were disasterous, almost non-exsistent when you peeled the paper off.  The muffin tops, however, were the most decadent things you've ever tasted, which was good since they were the only thing I had to bring that day! While the muffin tops were amazing, I highly recommend the muffin and top together as a whole.  This has become a source of humor between the two of us.  I cannot make these muffins without thinking of my wonderful friend and the story behind my first attempt at making them.

May they bring a smile to your face, a big one!


Regina's "To Die For" Blueberry Muffins 

Ingredients:
1 ½ cups of flour (I used half whole wheat)
¾ cups of sugar
½ tsp. salt
2 tsp. baking powder
1/3 cup vegetable oil
1 egg
Appx. 2/3 cup milk
1 Cup (or more) blueberries

For crumb topping:
½ cup sugar, ½ cup flour, ¼ cup butter

Method:
1. Preheat oven to 400 degrees.
2. Mix flour, sugar, salt and baking powder in a medium bowl and set aside.
3. Place 1/3 cup oil in measuring cup. Add one egg and enough milk to make one cup and mix.
4. Mix egg mixture with flour mixture.
5. Fold in one cup (or more) blueberries.
6. Fill muffin cups with batter.
7. Mix sugar, flour and butter for crumb topping with fork until crumbly.
8. Sprinkle topping over muffins before baking.
9. Bake 20-25 minutes until done.


Click here for a printable version

Monday, November 14, 2011

Old Family Favorites

The recipe I'm sharing today is an old family favorite.  I don't remember a time when chocolate crunch cookies weren't a staple when baking time rolled around.  This recipe comes from a family friend, Jamie Pearson.  She and her family feature prominently in my childhood memories.  Her son and I were best friends and partners in crime when we were little.  These cookies are melt in your mouth good and quickly became a favorite of my husband's when we were dating.  He wants me to warn you that inhaling when taking a bite is NOT advised.  He learned this the hard way.  Powdered sugar down your trachea/windpipe, is less than desireable.  Another tip, DON'T eat the raw chocolate dough.  It looks rich and decadent, but it tastes horrible by itself.  Apparently an entire batch was thrown out by a "dough tester" that was not wise to this fact.  Don't let this happen to your yummy cookie dough! 

So grab you're ingredients and get baking!  It's that time of year!

Chocolate Crunch Cookies   
Ingredients:
12 Tbsp. baking cocoa
4 Tbsp. oil
½ cup oil
2 cups sugar
4 unbeaten eggs
4 tsp. vanilla
2 cups flour
2tsp baking powder
½ tsp. salt.
Powdered Sugar

Method:
Mix cocoa with 4 Tbsp. oil.
Slowly blend in ½ cup oil and gradually mix as you go along.
Blend in sugar and add eggs 1 at a time. Beat well with each addition.
Add vanilla.
Sift together flour, baking powder and salt. Mix well.
Add to chocolate mixture. Mix well.
Chill for 1 hour.
When dough has chilled, scoop out by teaspoonful and roll in powdered sugar.
Place each powdered sugar covered ball on cookie sheet.
Bake at 350 degrees for 10-12 minutes (larger cookies will take a bit longer).


Click here for printable version