Kitchen Creations

Sunday, August 4, 2013

Chocolate Chip Cheater

I love baking.  I love the process of bringing ingredients together to create a sumptuous and satisfying treat for friends and family.  Every so often, I just want something quick, really quick and easy, really easy.  I know you can relate.  Well, to satisfy chocolate chip cookie cravings (especially when a certain husband regularly devours the frozen dough balls kept back for craving emergencies such as these), I found this little gem of a recipe, "Single Serving Deep Dish Cookie" on the blog Love From the Oven.  My boys are eating it right now.  Devouring it would be a more accurate description.  The smell amazing.  The are sooooo quick and soooo easy.  I really feel like I'm cheating.  I'm a chocolate chip cheater and I'm okay with that right now. 

Go ahead and give in to my peer pressure.  Be a chocolate chip cheater with me tonight!!

Chocolate Chip "Cheater" Cookie


Ingredients:
2 Tbsp. butter
1 Tbsp. brown sugar
1 Tbsp. granulated sugar
1 tsp. vanilla extract
scant 1/4 cup of flour (I used white whole wheat)
1/8 tsp. baking powder
dash of salt
chocolate chips to sprinkle on top

Method:
**You can do this all in one mug or mix it in a separate measuring cup and "bake" in individual ramekins for a special treat.
1.  Melt butter
2.  Mix in sugars & vanilla
3.  Mix in flour, baking powder and salt
a la mode version
4.  Sprinkle with desired amount of chocolate chips
5.  In cup or ramekin, cook in microwave for 40 - 60 seconds, depending on your microwave and on how done you like your cookies.  With no eggs in this recipe, you could eat it raw and not worry!
**Serve with ice cream on top if desired 

Enjoy!!!

Click here for printable version

Saturday, July 27, 2013

Chocolate Cravings

I wanted chocolate.  Brownies sounded good, but the 4 boys in the house wanted cookies.  I decided Brownie Cookies would work.  I didn't like any of the recipes I found, especially the parts that involved chilling the dough overnight.  Not only did that not work for my chocolate craving, it DEFINITELY didn't work for the boys. The two older boys helped me create and mix together this delicious cookie concoction.  Warning, this is NOT a healthy recipe, but it is sooooo yummy! 

So to Gabe & Nathanael, thank you..... we developed a winner!


Brownie Cookies

Ingredients:  
1 cup of unsalted butter
2/3 cups of cocoa powder
2 cups of sugar
2 tsp. vanilla
3 eggs
3 cups of whole wheat or white whole wheat flour
1 tsp. baking powder
2 tsp. salt
confectioners sugar to shake over unbaked dough before baking - if desired.

Method:
Pre-heat oven to 350 degrees
Melt butter in medium saucepan.
Stir in cocoa powder, followed by sugar and vanilla.
Mix in the eggs until all is well blended.
In a separate bowl mix together the flour, baking powder and salt until it is well blended.
Combine the flour mixture with the cocoa mixture.
Mix well and drop by teaspoonful onto non-greased baking sheets
Shake powdered sugar over dough before baking, if desired.
Powder sugar dusted cookie


Yields approximately 3 1/2 - 4 dozen cookies.

Click here for printable version

Tuesday, February 19, 2013

Do you know the muffin man?

I had some bananas on the counter and they were not looking so lovely any longer.  That always means its time for some baking.  I rarely make banana bread.  I usually make the dough into muffins.  We find the single servings perfect in our household and they freeze great that way too (that is if they last long enough to freeze any - warm baked muffins tend to disappear rather quickly).  I wanted a muffin that had some "umpf" to it this time, so I took my basic go to banana bread recipe and went from there.  We were all extremely pleased with the outcome!  Best of all, they are pretty darn good for you too!

What are you doing with your bananas?

Banana-Oat-Quinoa Muffins
Ingredients:
 4 ripe bananas (the riper, the sweeter, the better)
1/4 cup brown sugar (optional depending on how ripe the bananas are)
2 large eggs
1 Tbsp. vanilla
2 cups whole wheat flour
1 cup oats (you can add them as whole flakes or pulse them in a food processor)
1 cup  quinoa (you can add them uncooked for a crunchy texture or add it cooked for softer texture)
1 tsp. baking soda
1 tsp. baking powder
1 tsp. ground ginger
1/4 cup bran

Method:
Cook the quinoa if you are going to go the cooked route.  It takes 2 cups of water per 1 cup of quinoa and generally 20 minutes.  If you are cooking the quinoa, you will yield 3 cups cooked for every cup uncooked.  Keep this in mind.  You'll only need 1 - 1/2 cups of the cooked quinoa.
Mash together bananas (I use my mixer and just add the ingredients as I go). 
Next add the sugar if you choose to add it - it's only needed if the bananas aren't very ripe.
Add the eggs and vanilla and mix well.
Mix cooked (if going the cooked route) quinoa into the banana mixture at this point.
In a separate bowl combine flour, oats, quinoa (only if going the uncooked route), baking soda, baking powder, ginger and bran.  Mix well.
Add dry ingredients to wet and mix well.
Spoon into muffin cups and bake at 350 for 25 minutes or until tops start to brown and look crunchy.

Enjoy!  They are super yummy!

Click here for a printable link

Monday, February 11, 2013

Quick & Delicious!

I was searching the time-void otherwise known as "Pinterest" for some new dinner recipe inspiration.  I came across this delicious sounding meal, "Thai Fried Quinoa".  I was nervous about the young one.  He is picky, but I've learned that it's best not to plan or cook around his taste buds, they change rapidly, with his mood.  So, with a few adaptations to fit our family - the older boy will NOT eat peas and since he's so good about eating everything else, I indulge this aversion.  I have to say, this meal was AH-MAZ-ING!  We all had seconds, which unfortunately resulted in no leftovers in my lunchbox tomorrow.  Boo!  This recipe is quick, simple and healthy.  The cooking goes really quick, so read through it first and have your ingredients ready to go.  I did not do these things and Mr. Filabuster (a.k.a. our younger son) decided to vocalize every thought in his head at the same time I was reading the recipe and cooking.  Thus my advice, read through it first and have things read.  That's what my frazzled brain was wishing I'd done.

Enjoy a big bowl of this healthy yumminess tonight!

Thai Fried Quinoa  
*Adapted from Iowa Girl Eats food blog
Ingredients:
1 cup quinoa, rinsed and drained
1 cup lite coconut milk
1 cup chicken broth
1 tsp. olive oil
5 green onions, chopped
2 Tablespoons minced ginger
2 Tablespoons minced garlic
1 cup frozen edamame
1-8oz can pineapple tidbits, drained
1/4 cup cilantro, chopped
4 eggs
2-4 Tablespoons soy sauce (I used 4 because we like the flavor)
juice of half a lime
chopped cashews or peanuts (optional)

Method:  
  1. Place rinsed quinoa in a saucepan over high heat. Add coconut milk and chicken broth and bring to a boil. Once boiling, place a lid on top, turn the heat down to medium-low, and cook until all the liquid has been absorbed and quinoa is tender.  It takes about 15 minutes.
  2. While the quinoa is cooking, heat a large skillet over medium-high heat and spray with olive oil (or add to pan and swirl to distribute evenly). Add green onions, ginger, and garlic and cook for 1 minute, stirring constantly so the garlic doesn't burn.
  3. Next add the edamame, pineapple tidbits, and cilantro and cook for 1 additional minute.
  4. Push the ingredients to the sides of the pan, creating a clear space in the center. Whisk the eggs together in a small bowl, then pour into the pan. Stir with a spatula until the eggs are scrambled, then stir to combine with the rest of the ingredients.
  5. Add cooked quinoa, soy sauce and lime juice to the pan, and stir to combine. Cook for an additional minute or two, or until the quinoa begins to crisp up. Serve with optional chopped nuts on top.
Click here for printable recipe

Wednesday, February 6, 2013

Sweet + Sour = Yum!

In England the term "hotpot" means a casserole topped with sliced potatoes.  I found this recipe for sweet and sour mixed bean hotpot in one of my vegetarian cookbooks.  The name did not entice me but, as often is the case, the picture most definitely did.  It looked delectable, warm and hearty.  It also looked relatively easy!  Always a plus on a work night!  So, I set about recreating the recipe to meet our families likes and specifications.  This made a terrific main dish for us, paired with some fresh fruit.  If you are a must have meat person, this dish would be a fantastic side.  It is FULL of flavor and texture!  Either way, it's a nice change of pace from the norm!  It does take a bit to bake, but the good news is that the prep is minimal and you can do other things while this takes its sweet time in the oven.

Sweet & Sour Vegetable Bean Hotpot
Ingredients:
2 lbs Yukon Gold Potatoes
1 Tbsp. Olive Oil
3 Tbsp. Butter
1/3 cup Whole Wheat Flour
1 1/4 cups tomato sauce
2/3 cup of pear juice (apple would work too, but I had pear on hand)
4 Tbsp. light brown sugar
1/4 cup ketchup
1/4 cup cider vinegar
2 Tbsp. soy sauce
1/4 cup Vodka (optional - the original recipe called for Sherry, but I only had Vodka on hand)
1 can navy beans
1 can butter beans
1 can chick-peas
2 cups green beans
1 cup shallots, sliced
3 cups sliced mushrooms
1 Tbsp. fresh thyme
1 Tbsp. fresh marjoram
salt and ground pepper

Method:
  • Preheat the oven to 400 degrees.  Thinly slice the potatoes and boil them for 4 minutes.  Drain the potatoes and toss them with the olive oil, making sure they are coated all over.  Set them aside.
 
  • Melt the butter and add the flour, tomato sauce, pear juice, sugar, ketchup, vinegar, soy sauce and vodka in a large saucepan.  Heat gently while whisking until sauce begins to boil and thickens.  Simmer for 3 more minutes, stirring continuously.
 
  • Rinse and drain the beans and chick-peas and add to the sauce, along with all remaining ingredients.  Stir together, mixing well.
 
  • Spoon the bean mixture into baking dish.
 
  • Arrange the potato slices over the top of the bean mixture, overlapping them slightly, until the entire bean mixture is covered.
 
  • Cover with foil and back for 50 minutes, then remove foil and bake for an additional 20-25 minutes, until potatoes are golden.
Click here for printable recipe

Saturday, February 2, 2013

Dreaming Of Summer

Lately it's been rather cold and dreary here in the Northwest.  I enjoy all the seasons, but so many days of cold has left me dreaming a bit of warmth and the joys that summer brings.   One of those joys is fresh vegetables from the garden.  In my early growing up years, we lived out in the country in Southern Illinois and we had a huge garden.  One of our staple summer meals was spinach salad.  Really, this salad can be a side, but we loved it as a main dish.  Nothing is better on a hot summer evening than a big bowl of fresh, cool salad.  This salad can be tweaked however you need it to be; healthy, meatier, meatless......  I love it just the way my mom used to make it for us.  Be aware, you must eat this the same night, it's not nearly as good the next day.

Bring some summer dreams into your home tonight.


Spinach Salad 
Ingredients: 
2 bunches fresh spinach, washed & stems removed
4-5 boiled eggs, sliced
1/2 lb of bacon, cooked and sliced or broken up
1-2 bunches of green onions, sliced (depending on your love for onions)
For the dressing:
1/2 cup olive oil
1/4 cup vinegar (your favorite kind, but not balsamic)
1/4 cup sugar
1 Tbsp Worcestershire Sauce 
3 Tbsp. ketchup
dash of garlic salt/powder

Method:
  • Mix together ingredients for the dressing and shake well.  I usually use a mason jar.
  • Lightly toss all ingredients for the salad.
  • Either drizzle dressing over whole salad, or individual salads.
**Roasted sunflower seeds make an excellent substitution for the bacon if you are looking for a meatless alternative!
 
Enjoy!!!

Click here for printable recipe   
 

Friday, February 1, 2013

Easy Lasagna

My older son LOVES lasagna.  I don't really like making it much.  Lots of steps, lots of time involved.  I LOVE easy crock-pot meals.  I found this recipe for crock-pot lasagna and it felt like a match made in heaven.  I tried it out last night.  I was very low on energy and in this recipe I didn't even have to cook the noodles first!  I was hoping this worked out well.  I was concerned because you wouldn't get the crusty cheese top.  Would it be as good?  Would it be too liquidy?  Wait!  I didn't have enough of the thick sauce and now have to substitute my own homemade sauce, but it's thinner!  I did it anyway.  It was smelling great and looking great.  Now for the true test, taste!  It was winner all over.  This is the crusty cheese kind, but this is the melty goodness that satisfies in every way.  My sister also gave me a great idea when we discussed this recipe today.  You could use a kitchen torch (ala creme brulee) to get that nice crusty cheese on top!!!

Dive into this cheesy goodness soon!!

Crock-pot Lasagna

Ingredients:
12 whole wheat lasagna noodles
2 large jars pasta sauce (your favorite - thicker is going to make for a thicker lasagna, thinner is more soupy)
2 16-ounce containers of small curd cottage cheese (or ricotta)
2 eggs
1 10-ounce package of frozen spinach
2 tsp. ground nutmeg
1 package spaghetti sauce spice mix (this is optional, but I really liked the flavor it added)
1 cup shredded Mozzarella Cheese
1/2 cup shredded Parmesan Cheese

Method: 
  • Thaw spinach in microwave (2 minutes on high) and then squeeze out extra liquid using a kitchen towel.
 
  • Mix together cottage cheese/ricotta, eggs, nutmeg, spaghetti sauce, spinach, 1/2 cup of Mozzarella Cheese and 1/4 cup of Parmesan Cheese.
 
  • Layer 1 cup pasta sauce at the bottom of the crock-pot. Next layer 4 lasagna noodles (breaking as needed).  Now 1 more cup of sauce, then the cheese-spinach mixture.  Then another layer of 4 noodles and another cup of sauce and then the remaining  cheese-spinach mixture.  Top off with 4 more noodles and the remainder of the sauce.  
 
  • Place the lid on the crock-pot and cook on low for 5-6 hours (I did 6).  
  • In the last 10-15 minutes add the remaining cheese.  Cover and cook until ready to serve.


Enjoy with a nice salad and some crusty French bread.

Click here for printable recipe     
   

Thursday, January 31, 2013

On the subject of pudding....

Earlier this week I used homemade pudding to make the Blueberry Banger Trifle.  I had to refer back to this recipe for homemade "Banana Pudding".  My mom made this every Thanksgiving since I can remember.  I love it.  I made it recently to alleviate a little spell of homesickness.  It's that kind of comfort food; rich, creamy and delicious.  Again, this is a layered dessert and doesn't take long, except for the pudding thickening part.

Find some old-fashioned comfort with this dish today!


Banana Pudding      
Ingredients:
3/4 cup of sugar
2 Tbsp. all purpose flour
2 cups milk (I use 1%)
2 egg yolks, beaten
1/4 cup butter
1 tsp. pure vanilla extract
1 box Nilla Wafers
2-3 large bananas, sliced

Method:
  • Mix together sugar & flour in a medium saucepan, over low heat. 
  • Gradually add milk, whisking constantly
  • Allow the sugar/milk mixture cook on low, stirring often, until it thickens and starts to bubble (Watch carefully and make sure you keep it over low.  Milk scalds easily.  This part feels like it takes forever, which it kinda does.  It's worth it though and I promise, it does eventually thicken!)    
  • Once the mixture thickens, add 4 Tbsp. of the thickened mixture to the beaten eggs (this acclimates the eggs to the pudding temperature, slowly).
  • Add the eggs to the milk/sugar mixture and stir.  Allow to cook over low heat for 2 more minutes, stirring constantly.
  • Remove from heat.  Add butter and vanilla, mix well.
  • Now you are ready to layer!  Nilla Wafers, Banana Slices, Pudding, Nilla Wafers, Banana, Pudding Nilla Wafers.
 Enjoy!

Click here for printable recipe         

Wednesday, January 30, 2013

Chasing the "chill" away

This past fall I scoured recipe sites for a squash stew of sorts in order to use up an ENORMOUS squash given to us by our friends, the Weavers.  I had an idea of the flavors I wanted to combine and since none of the recipes fulfilled all of them, I decided to take some basic ideas and trek out on my own.  I was amazingly happy with the result and tried it out on my mom when I visited for my dad's surgery this past November.  She became its biggest fan and she doesn't even like sweet potatoes!  It's packed with good vitamins and protein.  The protein in my recipe comes from the beans and quinoa.  I didn't add meat, but some roasted chicken could easily be added and would taste great in this "chili/stew".   You can combine it with a nice cornbread or a crusty loaf of french bread and a green salad, to have the perfect soul-warming winter meal.

Chase away some winter chill with this delightful meal!

Squash-Sweet Potato & Quinoa Chili

Ingredients:
4 medium sweet potatoes (you can use any variety - yellow or orange)
1 medium squash (butternut is one of the best for this - any squash with a nice "meaty" center, not stringy)
4 Tbsp. Olive Oil
Salt & Pepper 
1 large sweet onion, chopped 
3 cloves garlic, minced
1 chipotle pepper, minced (These little guys are spicy so for reduced spice, remove seeds or substitute 4 Tbsp. of the "sauce" in the can)
3 cups cooked (or 2 cans, drained and rinsed) black beans or pinto beans
1 cup fresh or frozen corn (optional - I no longer add this because my oldest has decided he's not a fan of corn unless it's on the cob)
1 20-28 ounce can of crushed tomatoes
1 package of your favorite chili spice mixture - or the equivalent of your own chili spice mixture
2 cups vegetable or chicken broth
1 cup of uncooked quinoa 

Method:
  •  Peel squash and sweet potatoes and cut into cubes.  Toss cubes with 2 Tbsp. olive oil and salt and pepper (about 1 tsp. each) and put into a 9X13 baking pan.  Bake at 400 for about 30 minutes (until the squash and potatoes start to turn golden).  ****Side note, this alone makes an amazing side dish by just adding about 1/2 tsp. of sage!

  • While squash and sweet potatoes are baking, heat the remaining 2 Tbsp. of olive oil and add chopped onion and garlic, saute for 1-2 minutes.  Next add  the chipotle chili, beans, corn, chili spice mix and cooked squash & sweet potatoes.  Stir well. 

  •  Now add crushed tomotoes and broth.  Let mixture come to boil.
  • Add uncooked quinoa and stir well.  Let chili cook on medium for another 30 minutes to ensure quinoa is cooked through.  
Enjoy!

Click here for printable recipe  


Tuesday, January 29, 2013

Just A Little Trifle!

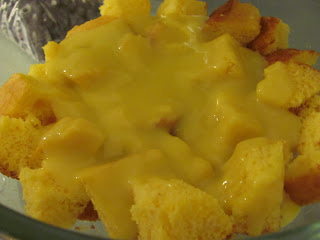
This dessert came about through a series of inspirations and culinary failures.  The end result was, I believe, a consummate success!  I will quote my friend Kelly on the end result, "I could seriously picture myself in a chair eating that trifle until I go into a coma."  That statement, my friends, is what every baker dreams of hearing, honestly!!!  So, here's the inspiration portion of the creation.  I wanted to make trifle, but my husband can't eat chocolate anymore.  So what to do?  I decided to make a fruit and vanilla pudding trifle.  For the cake.... Harvey Wallbanger, a Buegge family (or Whitley family) tradition!  I adjusted it and didn't add the pudding and exchanged orange juice for lemon juice (because of other ideas that were percolating in my head at that moment).  I had blueberries in the freezer that I had picked the previous summer, sumptuous blueberries that would taste great with a lemon flavor somewhere in the trifle!  Now for the failure turned inspiration portion.  I had a box of instant pudding, which normally goes in Harvey Wallbanger, but would be kept out to layer instead.  I tried to use almond milk in place of regular milk.  This was not a success, it was soupy.  Soooooo, change of plans..... make your own pudding from scratch; vanilla-lemon pudding!!!  So I had my layers, Harvey Wallbanger cake, vanilla-lemon pudding, blueberries and whip cream, Oh My!  It does take a bit of time to do this, but the results are so very worth it.

Here's to your trifle coma!!!

Blueberry Banger Trifle 
Ingredients:
Cake -
1 box yellow cake mix
3 eggs
3/4 cup oil
1/4 cup water
1/4 cup Vodka
1/4 cup Galliano
1/4 cup lemon juice
Pudding -
3/4 cup sugar
2 Tbsp. flour
2 cups milk
2 egg yolks, beaten
4 Tbsp. butter
1 tsp. vanilla
1 1/2 tsp. lemon juice
Rest of the trifle
Blueberries (about 2-3 cups)
Whip cream (enough to layer 2 times)

Method:
 
  • Preheat oven to 350 degrees
  • Mix all cake ingredients together and bake for 30-40 minutes.  I bake the cake in a lightly greased bundt pan.  Then cut the cake into cubes.  

  • In a medium saucepan combine 3/4 cup of sugar and 2 Tbsp. flour and slowly add 2 cups of milk, while stirring/whisking.
 

  • Cook mixture on low (this is important because milk can easily scald - I will warn you, this feels like it takes forever and honestly, it kinda does - it's the longest part of this dessert).
  • Once the mixture thickens and bubbles, add 4 Tbsp. of the hot mixture to the beaten eggs and stir in.  Then add the eggs to the full sugar/milk mixture.
  • Cook for 2 more minutes.
  • Then remove from heat and add butter, vanilla and lemon juice.  Stir.
  • Now you are ready to layer.  Cake pieces, pudding, blueberries, whip cream, blueberries, cake, pudding, blueberries and whip cream!

Enjoy!!!

Click here for printable recipe

Monday, January 28, 2013

Guinea For Jason


This recipe has made its rounds in several different forms, but one thing remains the same, it's completely addictive.  I was introduce to it by my lovely friend Amy and she called it chocolate crack, due to its addictive nature.  Well I was soon concocting my own batches of the stuff in my kitchen and becoming quite the addict myself.  At some point I decided I needed to bring this stuff to school and "share the wealth" or I'd be 2000 pounds soon!  I asked my colleague Jason if he'd like to be my guinea pig and try some treats I brought.  He misunderstood, mostly on purpose, and looked appalled that I wanted him to try guinea pig.  Well the "guinea pig" was tasted, adored and laughingly renamed, "Guinea".  Now I'm asked, "You got the guinea" on a regular basis.

So Jason, this one's for you!  Everyone else, beware!  This is shockingly easy to make and way too good to stop eating once you've succumbed!


Guinea (aka Chocolate Crack)  
Ingredients:
Graham Crackers (about 2 bags)
Butter (1-2 cups)
Brown Sugar (1-2 cups) - hey, I never said this was healthy!
1 tsp. vanilla extract
Chocolate Chips (1 -2 cups - depending on how much chocolate you want)
** Toasted Coconut, Toffee bits, Nuts, etc (optional)

Method:
  • Pre-heat oven to 350 degrees
  • Line a baking sheet with foil
  • Lay graham crackers down over the foil.  I like to break mine along the perforations and line them up.  It makes breaking them apart later, easier.
  • On stove top, melt butter in a medium saucepan.  Here's where you can decide to do the "healthy" version or the "over the top"  version.  I have not yet been brave enough to do the over the top.  My mind resists anything that calls for 2 cups of butter.  I just can't do it.
  • Once butter is melted add the brown sugar (1 cup if you did 1 cup of butter, and 2 cups if you did 2 cups of butter).  Stir until sugar incorporates into the butter. The mixture will bubble and thicken a bit.
  • Once the brown sugar melts and incorporates add vanilla and stir.
  • Next pour the mixture over the graham crackers.
  • Now bake 5-7 minutes or until the "toffee" becomes bubbly.
  • Now remove from oven and sprinkle chocolate chips over - I typically use 1 cup.  Otherwise I feel like the chocolate overwhelms the toffee flavor.
  • Now return to oven for 1 minute and remove again, spreading melted chocolate chips over the graham cracker/toffee with a spatula.
  • Now you can add the "optional" extras if you'd like
  • At this point you can let it cool or refrigerate or freeze it until it hardens, then break it up and store in an airtight container.

*Note:  My friend Stacy has made this substituting pretzels for the graham crackers.  Another delicious alternative!!!

Click here for printable recipe