Kitchen Creations

Friday, January 17, 2014

We Love Curry

We are a "mostly meatless" family, a term coined by my husband when he wanted to reduce the amount of meat he ate.  I'm always on the lookout for vegetarian or vegan options that are easy and packed with flavor.  I disovered this one on myrecipes.com and it delievers on both ease and tastiness!  The whole family LOVES it.  My two boys request it frequently.  I've made a resolution this year to eliminate my use of canned beans.  This is the only part of the recipe that takes much time.  Using canned chickpeas makes this dish come together extremely quickly.  I cannot say enough about the cilantro flavor in this dish.  It is an absolutely amazing compliment flavor. 

Enjoy and easy and flavor-filled meal you can feel good about tonight. 

Chickpea Curry  


Ingredients:
  • 2 cups uncooked brown rice
  • 1 Tbsp. olive oil
  • 1 large sweet onion, diced
  • 1 1/2 tsp. garam masala
  • 4 cups chickpeas, cooked (or 2 15-ounce cans, rinsed & drained)
  • 1 (15 ounce) can crushed tomatoes
  • 1 small bunch of spinach
  • 1/2 cup plain Greek yogurt
  • 1/2 tsp. salt
  • 1/4 cup chopped fresh cilantro

Method:
  • Cook rice according to package directions.
  • Saute onion in olive oil fo r5 minutes. 
  • Stir in garam masala and cook for 30 seconds, stir constantly.
  • Add chickpeas, tomatoes and spinach and cook 2 minute

  • Remove from heat, stir in yogurt and salt.
  • Sprinkle with cilantro.
  • Serve over rice & with naan.

Click here for printable recipe

Thursday, January 16, 2014

Enchilada Enchantment

I found this recipe on one of my very favorite food blogs Pinch of Yum.  I was looking for inspiration.  I wasn't feeling all that energetic and I needed to create the menu for the week.  Needless to say, my inspiration needed to come in the form of a tasty looking picture with an accompanying recipe that had minimal ingredients and minimal EASY steps.  This one caught my attention right away.  We LOVE enchiladas.  This recipe has all the yum of enchiladas without having to dip, fill and roll.  In addition it is delicious!  We've added it to a regular rotation and enjoy making additions, substitutions and the like depending on what we have on hand and what sounds good.

So have the whole enchilada with this casserole tonight!

Chicken Enchilada Casserole  
* Adapted from Pinch of Yum food blog         

Ingredients:   

  • 2 boneless, skinless chicken breasts
  • 1 15-20 oz can of enchilada sauce (or make your own, but that is NOT minimal or easy)
  • 2 cups of shredded cheese (I really enjoy medium cheddar on this!)
  • 6-8 whole wheat flour tortillas (the size of the tortilla will determine the number you need)
  • 1 can of refried beans (We prefer refried black beans.)
  • 1 handful chopped cilantro
  • 2-3 diced green onions  (optional, but a really great addition)


Method:

  1. Cook and shred the chicken.  You can boil it or bake it.  Make sure if you bake it to use a pan with a lid and have plenty of water in the pan so the chicken doesn't become tough.
  2. Preheat the oven to 375 degrees and spread a couple spoonfuls of the enchilada sauce on the bottom of a 9X9 (or so) baking dish.
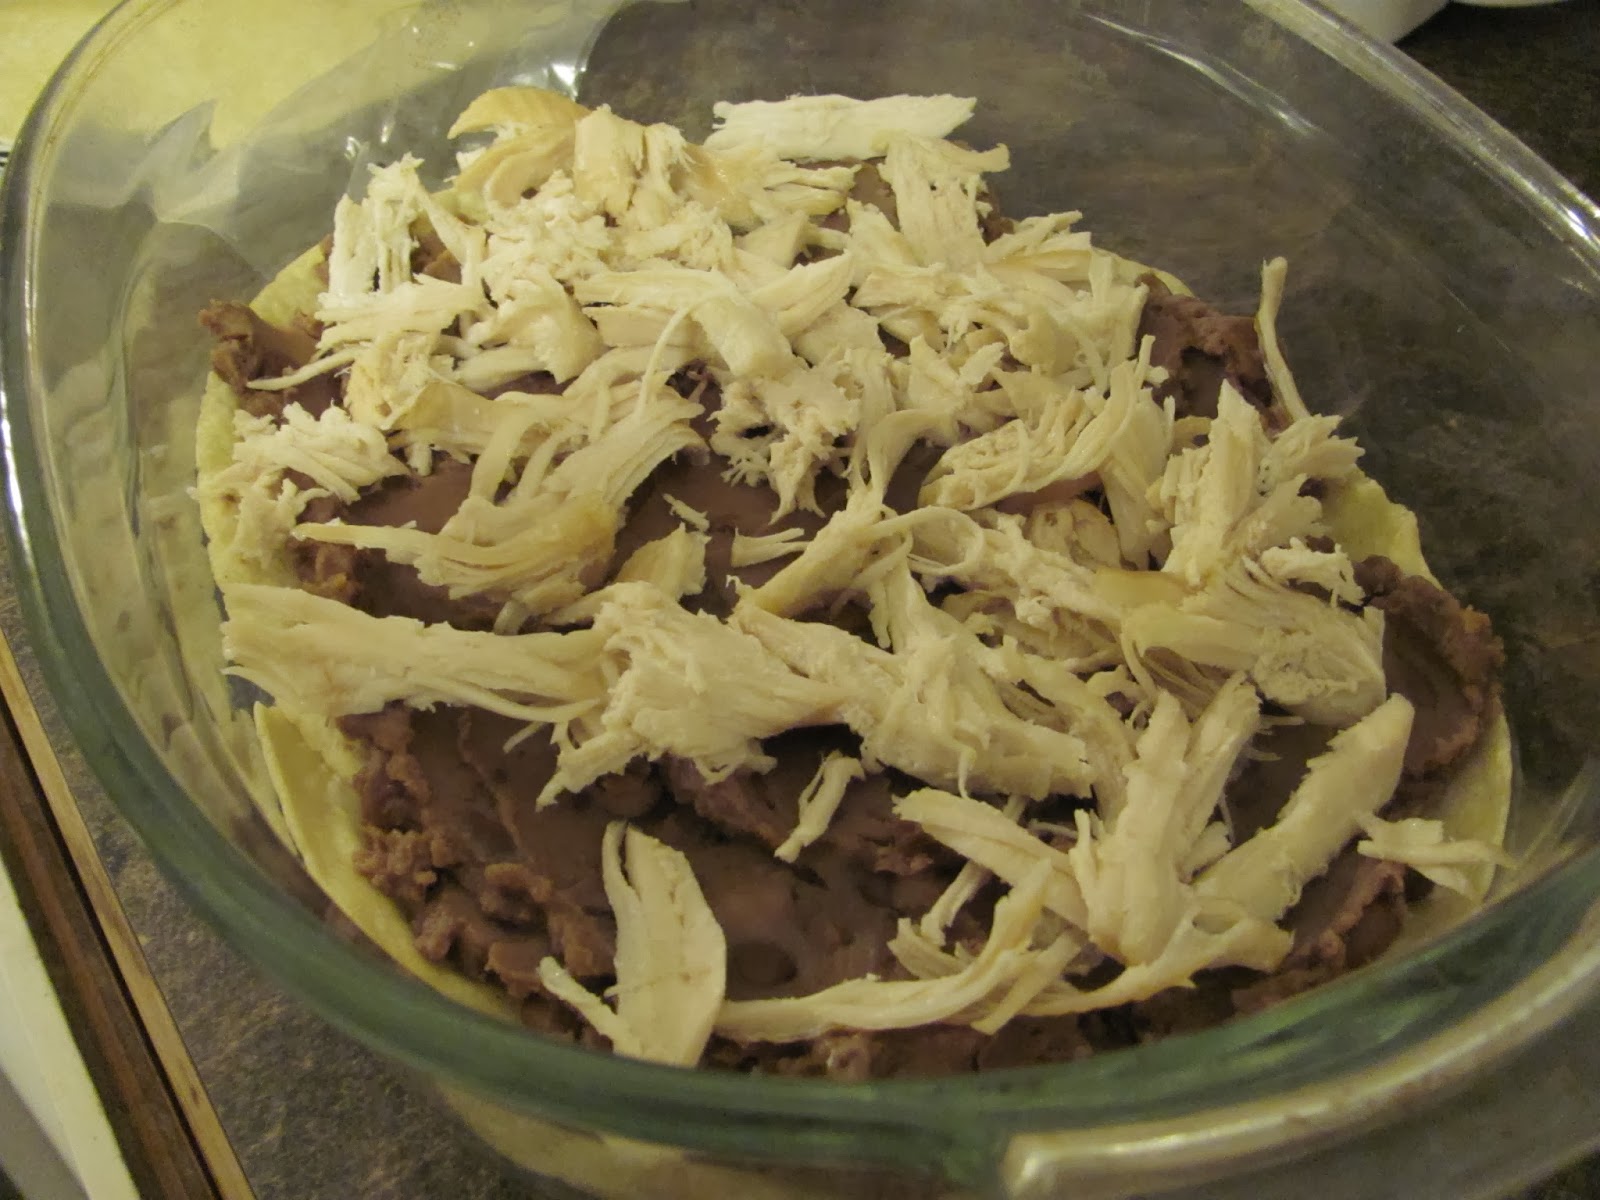
  3. Place two tortillas at the bottom of the dish.  You can overlap them to cover the entire surface.  Then layer beans, chicken, cheese, cilantro, onions, sauce, and tortillas, then repeat once.  This will make 2 layers.      
    • Make sure to keep some sauce and cheese to finish off the top of the casserole.
  4. Cover the top of the casserole with the remaining sauce and cheese 
  5. Bake for 35-40 minutes - golden brown and bubbling is what you want to see when you look in at it.
  6. Let the casserole rest for about 15 minutes once you remove it from the oven.  You can also garnish with green onions and cilantro at this point.

Sunday, August 4, 2013

Chocolate Chip Cheater

I love baking.  I love the process of bringing ingredients together to create a sumptuous and satisfying treat for friends and family.  Every so often, I just want something quick, really quick and easy, really easy.  I know you can relate.  Well, to satisfy chocolate chip cookie cravings (especially when a certain husband regularly devours the frozen dough balls kept back for craving emergencies such as these), I found this little gem of a recipe, "Single Serving Deep Dish Cookie" on the blog Love From the Oven.  My boys are eating it right now.  Devouring it would be a more accurate description.  The smell amazing.  The are sooooo quick and soooo easy.  I really feel like I'm cheating.  I'm a chocolate chip cheater and I'm okay with that right now. 

Go ahead and give in to my peer pressure.  Be a chocolate chip cheater with me tonight!!

Chocolate Chip "Cheater" Cookie


Ingredients:
2 Tbsp. butter
1 Tbsp. brown sugar
1 Tbsp. granulated sugar
1 tsp. vanilla extract
scant 1/4 cup of flour (I used white whole wheat)
1/8 tsp. baking powder
dash of salt
chocolate chips to sprinkle on top

Method:
**You can do this all in one mug or mix it in a separate measuring cup and "bake" in individual ramekins for a special treat.
1.  Melt butter
2.  Mix in sugars & vanilla
3.  Mix in flour, baking powder and salt
a la mode version
4.  Sprinkle with desired amount of chocolate chips
5.  In cup or ramekin, cook in microwave for 40 - 60 seconds, depending on your microwave and on how done you like your cookies.  With no eggs in this recipe, you could eat it raw and not worry!
**Serve with ice cream on top if desired 

Enjoy!!!

Click here for printable version

Saturday, July 27, 2013

Chocolate Cravings

I wanted chocolate.  Brownies sounded good, but the 4 boys in the house wanted cookies.  I decided Brownie Cookies would work.  I didn't like any of the recipes I found, especially the parts that involved chilling the dough overnight.  Not only did that not work for my chocolate craving, it DEFINITELY didn't work for the boys. The two older boys helped me create and mix together this delicious cookie concoction.  Warning, this is NOT a healthy recipe, but it is sooooo yummy! 

So to Gabe & Nathanael, thank you..... we developed a winner!


Brownie Cookies

Ingredients:  
1 cup of unsalted butter
2/3 cups of cocoa powder
2 cups of sugar
2 tsp. vanilla
3 eggs
3 cups of whole wheat or white whole wheat flour
1 tsp. baking powder
2 tsp. salt
confectioners sugar to shake over unbaked dough before baking - if desired.

Method:
Pre-heat oven to 350 degrees
Melt butter in medium saucepan.
Stir in cocoa powder, followed by sugar and vanilla.
Mix in the eggs until all is well blended.
In a separate bowl mix together the flour, baking powder and salt until it is well blended.
Combine the flour mixture with the cocoa mixture.
Mix well and drop by teaspoonful onto non-greased baking sheets
Shake powdered sugar over dough before baking, if desired.
Powder sugar dusted cookie


Yields approximately 3 1/2 - 4 dozen cookies.

Click here for printable version

Tuesday, February 19, 2013

Do you know the muffin man?

I had some bananas on the counter and they were not looking so lovely any longer.  That always means its time for some baking.  I rarely make banana bread.  I usually make the dough into muffins.  We find the single servings perfect in our household and they freeze great that way too (that is if they last long enough to freeze any - warm baked muffins tend to disappear rather quickly).  I wanted a muffin that had some "umpf" to it this time, so I took my basic go to banana bread recipe and went from there.  We were all extremely pleased with the outcome!  Best of all, they are pretty darn good for you too!

What are you doing with your bananas?

Banana-Oat-Quinoa Muffins
Ingredients:
 4 ripe bananas (the riper, the sweeter, the better)
1/4 cup brown sugar (optional depending on how ripe the bananas are)
2 large eggs
1 Tbsp. vanilla
2 cups whole wheat flour
1 cup oats (you can add them as whole flakes or pulse them in a food processor)
1 cup  quinoa (you can add them uncooked for a crunchy texture or add it cooked for softer texture)
1 tsp. baking soda
1 tsp. baking powder
1 tsp. ground ginger
1/4 cup bran

Method:
Cook the quinoa if you are going to go the cooked route.  It takes 2 cups of water per 1 cup of quinoa and generally 20 minutes.  If you are cooking the quinoa, you will yield 3 cups cooked for every cup uncooked.  Keep this in mind.  You'll only need 1 - 1/2 cups of the cooked quinoa.
Mash together bananas (I use my mixer and just add the ingredients as I go). 
Next add the sugar if you choose to add it - it's only needed if the bananas aren't very ripe.
Add the eggs and vanilla and mix well.
Mix cooked (if going the cooked route) quinoa into the banana mixture at this point.
In a separate bowl combine flour, oats, quinoa (only if going the uncooked route), baking soda, baking powder, ginger and bran.  Mix well.
Add dry ingredients to wet and mix well.
Spoon into muffin cups and bake at 350 for 25 minutes or until tops start to brown and look crunchy.

Enjoy!  They are super yummy!

Click here for a printable link

Monday, February 11, 2013

Quick & Delicious!

I was searching the time-void otherwise known as "Pinterest" for some new dinner recipe inspiration.  I came across this delicious sounding meal, "Thai Fried Quinoa".  I was nervous about the young one.  He is picky, but I've learned that it's best not to plan or cook around his taste buds, they change rapidly, with his mood.  So, with a few adaptations to fit our family - the older boy will NOT eat peas and since he's so good about eating everything else, I indulge this aversion.  I have to say, this meal was AH-MAZ-ING!  We all had seconds, which unfortunately resulted in no leftovers in my lunchbox tomorrow.  Boo!  This recipe is quick, simple and healthy.  The cooking goes really quick, so read through it first and have your ingredients ready to go.  I did not do these things and Mr. Filabuster (a.k.a. our younger son) decided to vocalize every thought in his head at the same time I was reading the recipe and cooking.  Thus my advice, read through it first and have things read.  That's what my frazzled brain was wishing I'd done.

Enjoy a big bowl of this healthy yumminess tonight!

Thai Fried Quinoa  
*Adapted from Iowa Girl Eats food blog
Ingredients:
1 cup quinoa, rinsed and drained
1 cup lite coconut milk
1 cup chicken broth
1 tsp. olive oil
5 green onions, chopped
2 Tablespoons minced ginger
2 Tablespoons minced garlic
1 cup frozen edamame
1-8oz can pineapple tidbits, drained
1/4 cup cilantro, chopped
4 eggs
2-4 Tablespoons soy sauce (I used 4 because we like the flavor)
juice of half a lime
chopped cashews or peanuts (optional)

Method:  
  1. Place rinsed quinoa in a saucepan over high heat. Add coconut milk and chicken broth and bring to a boil. Once boiling, place a lid on top, turn the heat down to medium-low, and cook until all the liquid has been absorbed and quinoa is tender.  It takes about 15 minutes.
  2. While the quinoa is cooking, heat a large skillet over medium-high heat and spray with olive oil (or add to pan and swirl to distribute evenly). Add green onions, ginger, and garlic and cook for 1 minute, stirring constantly so the garlic doesn't burn.
  3. Next add the edamame, pineapple tidbits, and cilantro and cook for 1 additional minute.
  4. Push the ingredients to the sides of the pan, creating a clear space in the center. Whisk the eggs together in a small bowl, then pour into the pan. Stir with a spatula until the eggs are scrambled, then stir to combine with the rest of the ingredients.
  5. Add cooked quinoa, soy sauce and lime juice to the pan, and stir to combine. Cook for an additional minute or two, or until the quinoa begins to crisp up. Serve with optional chopped nuts on top.
Click here for printable recipe

Wednesday, February 6, 2013

Sweet + Sour = Yum!

In England the term "hotpot" means a casserole topped with sliced potatoes.  I found this recipe for sweet and sour mixed bean hotpot in one of my vegetarian cookbooks.  The name did not entice me but, as often is the case, the picture most definitely did.  It looked delectable, warm and hearty.  It also looked relatively easy!  Always a plus on a work night!  So, I set about recreating the recipe to meet our families likes and specifications.  This made a terrific main dish for us, paired with some fresh fruit.  If you are a must have meat person, this dish would be a fantastic side.  It is FULL of flavor and texture!  Either way, it's a nice change of pace from the norm!  It does take a bit to bake, but the good news is that the prep is minimal and you can do other things while this takes its sweet time in the oven.

Sweet & Sour Vegetable Bean Hotpot
Ingredients:
2 lbs Yukon Gold Potatoes
1 Tbsp. Olive Oil
3 Tbsp. Butter
1/3 cup Whole Wheat Flour
1 1/4 cups tomato sauce
2/3 cup of pear juice (apple would work too, but I had pear on hand)
4 Tbsp. light brown sugar
1/4 cup ketchup
1/4 cup cider vinegar
2 Tbsp. soy sauce
1/4 cup Vodka (optional - the original recipe called for Sherry, but I only had Vodka on hand)
1 can navy beans
1 can butter beans
1 can chick-peas
2 cups green beans
1 cup shallots, sliced
3 cups sliced mushrooms
1 Tbsp. fresh thyme
1 Tbsp. fresh marjoram
salt and ground pepper

Method:
  • Preheat the oven to 400 degrees.  Thinly slice the potatoes and boil them for 4 minutes.  Drain the potatoes and toss them with the olive oil, making sure they are coated all over.  Set them aside.
 
  • Melt the butter and add the flour, tomato sauce, pear juice, sugar, ketchup, vinegar, soy sauce and vodka in a large saucepan.  Heat gently while whisking until sauce begins to boil and thickens.  Simmer for 3 more minutes, stirring continuously.
 
  • Rinse and drain the beans and chick-peas and add to the sauce, along with all remaining ingredients.  Stir together, mixing well.
 
  • Spoon the bean mixture into baking dish.
 
  • Arrange the potato slices over the top of the bean mixture, overlapping them slightly, until the entire bean mixture is covered.
 
  • Cover with foil and back for 50 minutes, then remove foil and bake for an additional 20-25 minutes, until potatoes are golden.
Click here for printable recipe