Kitchen Creations

Friday, July 31, 2020

Healthy and Fast

I've been mostly aiming for meals that are healthy and fast.  Really who isn't in a perfect world.  My two boys have become increasingly health-conscious and desirous of meals with lots of veggies and a good amount of protein. Teenage boys love building muscles....it also seems to be going rather well for them.  😊  In desperation, I typed, "fast, healthy, fresh meals" into my internet search browser and came across a website/blog I fell in love with,  iFOODreal.com . Olena is the creator of this blog and she is into making meals from real food.....simple and fresh ingredients.  I started exploring more on her site and came across a recipe for Korean Ground Beef and Rice Bowls.  It sounded good but I was going to save it for another week.  Flash forward a week and I COULD NOT remember the site I found or the exact recipe name so I ended up googling Korean Beef Bowls and got a million different recipes.  The end result is what you find below....a mishmash of those million different recipes. 


 (Honest moment:  It changes every time I make it based on the veggies I have on hand.  The recipe below was created based on my latest making of this recipe and writing things down.)

I hope you enjoy this as much as my family!  It was an instant hit!

Korean Ground Turkey & Veggie Bowls       
Ingredients:
1 Tbsp. olive oil (if not water sauteing)                                
3 medium carrots, half-moon slices
1 medium onion, chopped
1 red pepper, chopped
2 cloves garlic, minced
1 lb. ground turkey
1 large zucchini or yellow squash, diced small
1 cup broccoli florets
1 cup chopped kale or spinach
4-5 green onions, chopped

"Sauce":
2 Tbsp coconut aminos
3 Tbsp low sodium soy sauce
2 Tbsp ground ginger
1/4 tsp. garlic powder                                      
1 tsp. sesame oil
1 Tbsp. rice vinegar
1 Tbsp pure maple syrup or honey OR 1 tsp. monk fruit sweetener

Method:
1.  Heat oil or water for sauteing onion and pepper.  Saute carrot, onion and pepper until beginning to look golden (approximately 4-5 minutes).  With water sauteing make sure your water is hot before adding veggies and have extra water on hand to add when veggies start to stick.
2.  Mix together ingredients for "Sauce" and set aside
3.  Add garlic and saute 30 seconds
4.  Add ground turkey and cook until meat is browned.
5.  Add in other veggies (zucchini, broccoli, kale), saute for 3-4 minutes, until veggies softened but not soggy.
6.  Stir in "sauce" and chopped green onions.

***serve over rice, quinoa, rice noodles or scoop into nice big lettuce leaves.


Thursday, July 30, 2020

I'm Back

  
Boy, it's been a bit.  I've had a long hiatus from blogging and have been rather reluctant about cooking and baking in general since then.  In the past few months, it seems to be coming back, that old love.  I find myself yearning for time in the kitchen and not being totally resistant to making dinner.  It feels nice to want to cook again....to feel some excitement about making food.  It's been a long process to get back to this point.

I recently posted a few dinners I was making during a Pampered Chef on-line party and received requests for the recipes.  I thought, why not put them on the blog and keep them in a format I can easily access and share, so here it goes.

Lovely bowl of curry with garnish

The first is absolutely my new, go-to comfort food.  I cannot tell you how good this meal makes me feel, body and soul.  I've adapted it from a recipe passed on by a friend who attended a local cooking class.  I never leave recipes alone and I love adding tons of veggies to things. 

I am a big Thai curry fan and LOVE this recipe.  Hope you love it too!

Chickpea & Veggie Thai Curry    
Ingredients:                                                                                            
  1/2 tsp. olive oil (not needed if water sauteing)                           
  3 small carrots, peeled and diced
  1 small onion (approx. 1 cup chopped)
  1 red pepper, chopped

Optional Veggies: Broccoli, Zucchini, Kale                                     
  1-2 Tbsp minced ginger root
  3 Tbsp. red or green curry paste
  4 cloves minced garlic
  1/3 cup coconut aminos
  1 Tbsp. soy sauce (I use reduced sodium)
  2 cans (13.5 oz) light coconut milk
  1 can (13.5 oz) chickpeas, drained and rinsed 
  1/2 cup of water.

****Peanuts, Thai Basil and Lime are great garnishes

Method:
1.)  Add oil to the (or layer of water if water sauteing veggies).  When hot, add carrots, onions, red pepper, and ginger. Saute for approximately 5 minutes, until veggies soften and begin to get a bit golden.
2.)  While the carrot/onion mixture is sauteing, mix together the curry paste, garlic, coconut aminos, and soy sauce in a separate bowl.
3.)  Add broccoli, zucchini and kale (or whatever other veggies you'd like here) and saute another 3 minutes.
4.)  Add coconut milk, chickpeas, curry sauce mixture and water.  Bring to a slow simmer to heat through.
5.)  Serve with rice, cauliflower rice, rice noodles.....whatever you prefer and garnish with peanuts, Thai Basil and Lime.  

Enjoy!!

Tuesday, April 14, 2015

My new favorite treat

My friend Stacy has been making these "Coconut Delights" (that's what I call them in my head) for some time now.  I adore them.  This is unusual.  I love coconut flavor.  I detest the feel of raw coconut shreds or flakes in my mouth.  Really, really detest.  These have raw coconut in them and I LOVED them!  I've been wanting to get on making them for some time and I finally got there.  The original recipe comes from the Wellness Mama website.  I had some confusion with coconut oil amount while using this site to make them.  I decided to go ahead and post the recipe that worked for me on this blog and let you all go from there.  These babies are coconut-chocolate goodness, I'm telling you!  I left some of them un-coated by chocolate for my poor husband who can no longer eat chocolate.  He wholly backs the non-chocolate "Delights", so there's a nice variation for you too!

These little desserts certainly hit the spot!  Enjoy one, or two, tonight, guilt free..... well mostly!


Coconut Delights:   
Ingredients:

1 1/3 cups shredded coconut
1/3 cup coconut oil
1/2 cup almond butter  (you can also use peanut butter)
1 tsp. vanilla extract
1 cup semi-sweet chocolate chips (Ghirardelli Chocolate Chips are the BOMB on these!)
1 Tbsp. coconut oil

Method:
1.)  Mix together shredded coconut, 1/3 cup coconut oil (melted), almond butter and vanilla extract.
2.)  Form into balls and place on a wax paper covered cookie sheet

3.)  Place balls in freezer for approximately 45 minutes- 1 hour, until fully hardened
4.)  Melt chocolate chips and 1 Tbsp. coconut oil in microwave (or over double boiler).  I did the microwave.  I stirred between 15 second intervals until the chocolate was smooth.
5.)  Dip coconut clusters into the melted chocolate and place back on cookie sheet.
6.)  Refrigerate to allow chocolate to harden.

Enjoy!

Click here for printable recipe

Healthy & Economical

One of my favorite snacks is a cherry pie Larabar.  I've seen the recipes for creating your own and often thought to myself, for the time and price of ingredients, I'll just continue to buy them.  During my spring break I decided to do a little research.  I bought all the ingredients to make a couple kinds of Larabars.  I totaled the amounts and tallied my time....  20 minutes, 60 cents per bar later & a thumbs up from EVERY member of my family AND my good friend Stacy... I am a convert to making your own!   I love these homemade treats that are packed with good things for you! My husband has affectionately termed them, "Gretchebars".

These little bits of deliciousness with keep in an airtight container in your fridge for up to 3 weeks and in your freezer for up to 3 months.  I wrap mine individually in saran wrap, but it's not required.  Another great thing about this recipe is how easy it is to take the ingredients and play with them to make them your own.  Substitute the dried fruit of your choosing, play with the nut to fruit ratio, add some favorite spices - nutmeg, ginger or cinnamon anyone??

Here's to your healthy snacking!

Homemade Larabars aka "Gretchebars"  

Ingredients:
Cherry Pie
Mild olive oil or cooking oil (for your pan)
1 cup dried cherries
1/4 cup pitted, soft whole dates (pack 'em in)
1 cup warm water (if you have very dry fruit, if not, this isn't necessary)
1 cup roasted almonds
1/4 tsp. ground cinnamon
1/4 tsp. vanilla
1/8 tsp. ground ginger
1/8 tsp. sea salt

Apple Pie
Mild olive oil or cooking oil (for your pan)
1 cup dried apples
1/4 cup pitted, soft whole dates (pack 'em in)
1 cup warm water (if you have very dry fruit, if not, this isn't necessary)
1 cup raw walnuts
1 1/2 tsp. ground cinnamon
1/4 tsp. vanilla
1/8 tsp. ground ginger
1/8 tsp. ground nutmeg
1/8 tsp. sea salt

Method:
1.)  Line an 8X8 pan with plastic wrap and gently rub a dab of oil over the surface of the plastic wrap.
2.)  Place fruit in a bowl and cover with warm water and let it soak for 5 minutes. (Skip this step if your dried fruit is soft and still retains a good deal of moisture).  Then drain your fruit & pat it dry.
3.)  Place your nuts in a food processor and pulse until they are finely chopped.  Add in the fruit, spices and salt.  Pulse until the fruit is blended and the mixture begins to stick together.    It takes about 2 minutes.
4.)  Transfer the mixture to your pan.  Either with slightly oiled hands or parchment paper that has been slicked with a bit of oil, press down on mixture and flatten evenly into the pan.
5.)  Place in the refrigerator for 30 minutes.  Remove and cut into bars.
6.)  Wrap & place in an airtight container in the fridge for up to 3 weeks and freezer for up to 3 months.

click here for printable recipe


Tuesday, March 24, 2015

Sweet & Tangy

Today one of my favorite people came over to spend a few hours.  Cassidy loves books and baking.  It's no wonder we get along.  Who cares if she is 10 and I am..... well not 10.  We had a wonderful time gathering ingredients, talking about Trixie Belden, singing along with whatever popped up on the iPod and putting together a brand new recipe.  We dove right into the creation of this recipe and we knew this was going to be good when we started getting wiffs of the batter as it mixed and then as it baked.  It's a beautiful sunny day outside and these little gems suit the mood just right.  Raspberry mixed in a buttery batter and topped with a tangy lemon glaze and sugared lemon zest... my, my, my.

Enjoy, Cassidy and I certianly did!

Lemon Glazed Raspberry Muffins

Ingredients:
Muffins:
2 cups all-purpose flour
1 Tablespoon baking powder
½ teaspoon salt
1 egg
1 cup sugar
1 ½ tsp lemon zest
¼ cup unsalted butter (melted)
1 cup sour cream
1 ½ cup raspberries
Glaze:
¼ cup granulated sugar
½ cup fresh lemon juice
¼ cup granulated sugar (no this is not a mistake - there are 2 steps that each require the sugar)
1 tsp lemon zest


Method:
  • Pre-heat the oven to 350 degrees.  Grease your muffin pan or line with muffin cups
  • If using fresh raspberries rinse and let dry.  If frozen remove from freezer and place in measuring cup or bowl.
  • Mix the flour, baking powder and salt together thoroughly.
  • Using a stand mixer or large bowl, combine the egg and 1 cup of sugar.  It should look thick and creamy.  Add the 1 ½ tsp lemon zest and the melted butter and combine.  The add the sour cream.  Stir until ingredients are just combined - do not over mix.
  • Stir the flour mixture into the egg/butter mixture using a wooden spoon or spatula.  Again, do not over mix.  Stop just before the mixture is completely combined.
  • Once the raspberries are dry, sprinkle a tablespoon of flour over the raspberries and toss to coat.  
  • Gently fold the raspberries into the batter.
  • Spoon batter into the muffin tin.  About 3 tablespoons per muffin will do.
  • Bake for 25 minutes - until toothpick inserted in center comes out clean.  Let set for about 10 minutes then transfer to wire rack.
  • While the muffins are cooking you can prepare the glaze.  Combine ¼ cup sugar with the ½ cup fresh lemon juice.  Turn the heat to medium and stir to combine.  Let it simmer until the sugar dissolves and the mixture becomes syrupy.  It takes about 15 minutes.
  • Combine ¼ cup sugar with the 1 tsp. lemon zest.
  • Brush the top of each muffin with the lemon glaze.  Dip the tops of the muffins into the sugar-zest mixture.  
Cassidy dipping muffin tops into the sugared zest.

Wednesday, July 30, 2014

In love with rhubarb

I fell in love with rhubarb when I was in 2nd grade and living in Southern Illinois.  I was visiting my friend, Rebecca, and having a blast swinging from the hayloft in her barn and running around her huge yard.  That evening after dinner came strawberry-rhubarb pie. I'd never even heard of rhubarb.  I tasted it and was instantly besotted.  I came home and demanded a reason for never having tasted this delicious..... fruit? vegetable? What is it?  My mom's answer.... "because I can't stand it".  So fast-forward years later to Yakima, Washington and the gigantic and ever-producing rhubarb plants in my yard.  Now I have more rhubarb than I know what to do with.  I freeze it, make sauces, make crumbles, pies and jam, anything and everything.  I now have a delightful addition to my rhubarb arsenal, rhubarb upside-down cake.  It's inspiration is taken from the pear-cranberry upside-down cake I blogged on a couple years ago.  Sweet and tart combined with thick, spiced cake and crusty edges.  Mmmmmmm, so good.   Such a good reason to fire up the oven in 100 degree weather!!!

Rhubarb Upside-Down Cake    

Ingredients:
  Topping - 
  3 cups of sliced rhubarb
  1/2 cup packed brown sugar
  2 Tbsp. flour
  1/4 tsp. of nutmeg
  1/4 cup butter or coconut oil

  Cake Batter -
  1/4 cup melted butter or coconut oil
  1/2 cup sugar
  1 egg
  1.5 cups of flour - I used white whole wheat
  1/2 tsp. nutmeg
  1/4 tsp. salt
  2/3 cup of almond milk

Method:
*  Heat oven to 350 degrees and place 9" round cake pan into the oven with the 1/4 cup of butter or coconut oil
*  Stir together the rhubarb, brown sugar, flour and nutmeg
*  Once butter/oil is melted, remove pan from oven and add the rhubarb mixture.
*  Mix together dry ingredients for the cake batter and then add the wet ingredients to the dry.
*  Mix dry and wet ingredients together and spread atop the rhubarb mixture.
*  Place cake pan back into the 350 degree oven and bake for 45 minutes or until a toothpick inserted in the middle of the cake comes out clean.
*  Remove from oven and run a butter knife around the cake pan edge.
*  Turn cake over onto a platter
*  Enjoy!

Click here for a printable recipe

Friday, July 25, 2014

Tex-Mex, Yes-Mex!

This post will fly in the face of many previous posts.  I have posted countless meat-less dishes, favorites of our mostly meatless family.  Recently, however, in an attempt to figure out what my body and stomach like and don't like, I embarked on the "Whole 30" journey.  Woah!  HARD!  I did find some absolutely terrific recipes and they have quickly become family favorites.  We tend toward the vegetable heavy meals, of which there are many.  I discovered this little gem at Popular Paleo while searching for a recipe for my friend and her family.  It was a large group and most of them were Paleo people.  I, of course, made a few alterations.  I just can't help it.  It looked and smelled so delicious I immediately made it for our family too.  What a winner!  Paleo or not, this meal will satisfy in EVERY way.  Lots of veggies, lots of flavor and it fills your tummy with good nutrition that keeps hunger at bay for a long, LONG time.

Flex your Tex-Mex muscle tonight with this casserole.  You won't be sorry!

PaleoTex-Mex Casserole   

Ingredients:
1-2 lbs. of lean ground turkey
2 cups kale (you can also use spinach)
2-3 carrots, diced (about a cup)
1 parsnip, diced (about a cup and a half)
1 zucchini, diced (6″ zucchini/one cup)
2 cups diced bell peppers
1 large onion, diced
3-4 cloves garlic, minced
14.5 oz can organic diced tomatoes
3 TBSP preferred coconut oil (Paleo), olive oil (non-Paleo)
1/3 cup taco seasoning (or make your own)
1/2 tsp sea salt
5 cups shredded sweet potatoes (I have also used Yukon Gold and Russets on top).
1/2 cup coconut oil, melted
1/2 tsp onion powder
1/2 tsp chili powder
1/2 tsp ground coriander
For Garnish: fresh cilantro, green onions, avocado slices and/or hot sauce

Method:
1.)  Pre-heat oven to 375 degrees
2.)  Prepare (chop/dice/mince) all vegetables
3.)  Melt the 1 1/2 Tbsp of the coconut oil (or heat the olive oil) in a large, heavy bottomed skillet or pan.
4.)  Add the kale, carrots, parsnip, zucchini, bell peppers, onions,and garlic.  Mix in sea salt and cook vegetables down until you are able to pierce them with a fork.  Remove from pan and set aside.
5.)  Heat the other 1 1/2 Tbsp of coconut, or olive oil, and add the ground turkey, combining it with the taco seasoning.  Mix and cook until brown.
6.)  While the meat is cooking, grate the sweet potatoes.  This task is a cinch with a food processor!  Three large sweet potatoes should give you 5 cups of grated.  Place grated potatoes into a large mixing bowl.
7.)  Melt the 1/2 cup of coconut oil and pour over the shredded potatoes while it is warm.  Waiting too long will allow the oil to cool and begin to solidify again.  
8.)  Sprinkle the potatoes with the onion powder, chili powder and ground coriander and mix in.

9.)  Now add the cooked vegetables, diced tomatoes and ground turkey back into the pan and heat for 3 minutes.
10.)  Transfer the mixture into a 9X13 baking dish and cover with the shredded sweet potatoes.

11.)  Cover with foil and bake at 375 degrees for 30 minutes.
12.)  Remove the foil and broil on low for 5-10 minutes, or until potatoes are browned.

***Hint:  As mentioned at Popular Paleo, this casserole is amazing when added to a fried egg in the morning!!!!!

Friday, January 17, 2014

We Love Curry

We are a "mostly meatless" family, a term coined by my husband when he wanted to reduce the amount of meat he ate.  I'm always on the lookout for vegetarian or vegan options that are easy and packed with flavor.  I disovered this one on myrecipes.com and it delievers on both ease and tastiness!  The whole family LOVES it.  My two boys request it frequently.  I've made a resolution this year to eliminate my use of canned beans.  This is the only part of the recipe that takes much time.  Using canned chickpeas makes this dish come together extremely quickly.  I cannot say enough about the cilantro flavor in this dish.  It is an absolutely amazing compliment flavor. 

Enjoy and easy and flavor-filled meal you can feel good about tonight. 

Chickpea Curry  


Ingredients:
  • 2 cups uncooked brown rice
  • 1 Tbsp. olive oil
  • 1 large sweet onion, diced
  • 1 1/2 tsp. garam masala
  • 4 cups chickpeas, cooked (or 2 15-ounce cans, rinsed & drained)
  • 1 (15 ounce) can crushed tomatoes
  • 1 small bunch of spinach
  • 1/2 cup plain Greek yogurt
  • 1/2 tsp. salt
  • 1/4 cup chopped fresh cilantro

Method:
  • Cook rice according to package directions.
  • Saute onion in olive oil fo r5 minutes. 
  • Stir in garam masala and cook for 30 seconds, stir constantly.
  • Add chickpeas, tomatoes and spinach and cook 2 minute

  • Remove from heat, stir in yogurt and salt.
  • Sprinkle with cilantro.
  • Serve over rice & with naan.

Click here for printable recipe

Thursday, January 16, 2014

Enchilada Enchantment

I found this recipe on one of my very favorite food blogs Pinch of Yum.  I was looking for inspiration.  I wasn't feeling all that energetic and I needed to create the menu for the week.  Needless to say, my inspiration needed to come in the form of a tasty looking picture with an accompanying recipe that had minimal ingredients and minimal EASY steps.  This one caught my attention right away.  We LOVE enchiladas.  This recipe has all the yum of enchiladas without having to dip, fill and roll.  In addition it is delicious!  We've added it to a regular rotation and enjoy making additions, substitutions and the like depending on what we have on hand and what sounds good.

So have the whole enchilada with this casserole tonight!

Chicken Enchilada Casserole  
* Adapted from Pinch of Yum food blog         

Ingredients:   

  • 2 boneless, skinless chicken breasts
  • 1 15-20 oz can of enchilada sauce (or make your own, but that is NOT minimal or easy)
  • 2 cups of shredded cheese (I really enjoy medium cheddar on this!)
  • 6-8 whole wheat flour tortillas (the size of the tortilla will determine the number you need)
  • 1 can of refried beans (We prefer refried black beans.)
  • 1 handful chopped cilantro
  • 2-3 diced green onions  (optional, but a really great addition)


Method:

  1. Cook and shred the chicken.  You can boil it or bake it.  Make sure if you bake it to use a pan with a lid and have plenty of water in the pan so the chicken doesn't become tough.
  2. Preheat the oven to 375 degrees and spread a couple spoonfuls of the enchilada sauce on the bottom of a 9X9 (or so) baking dish.
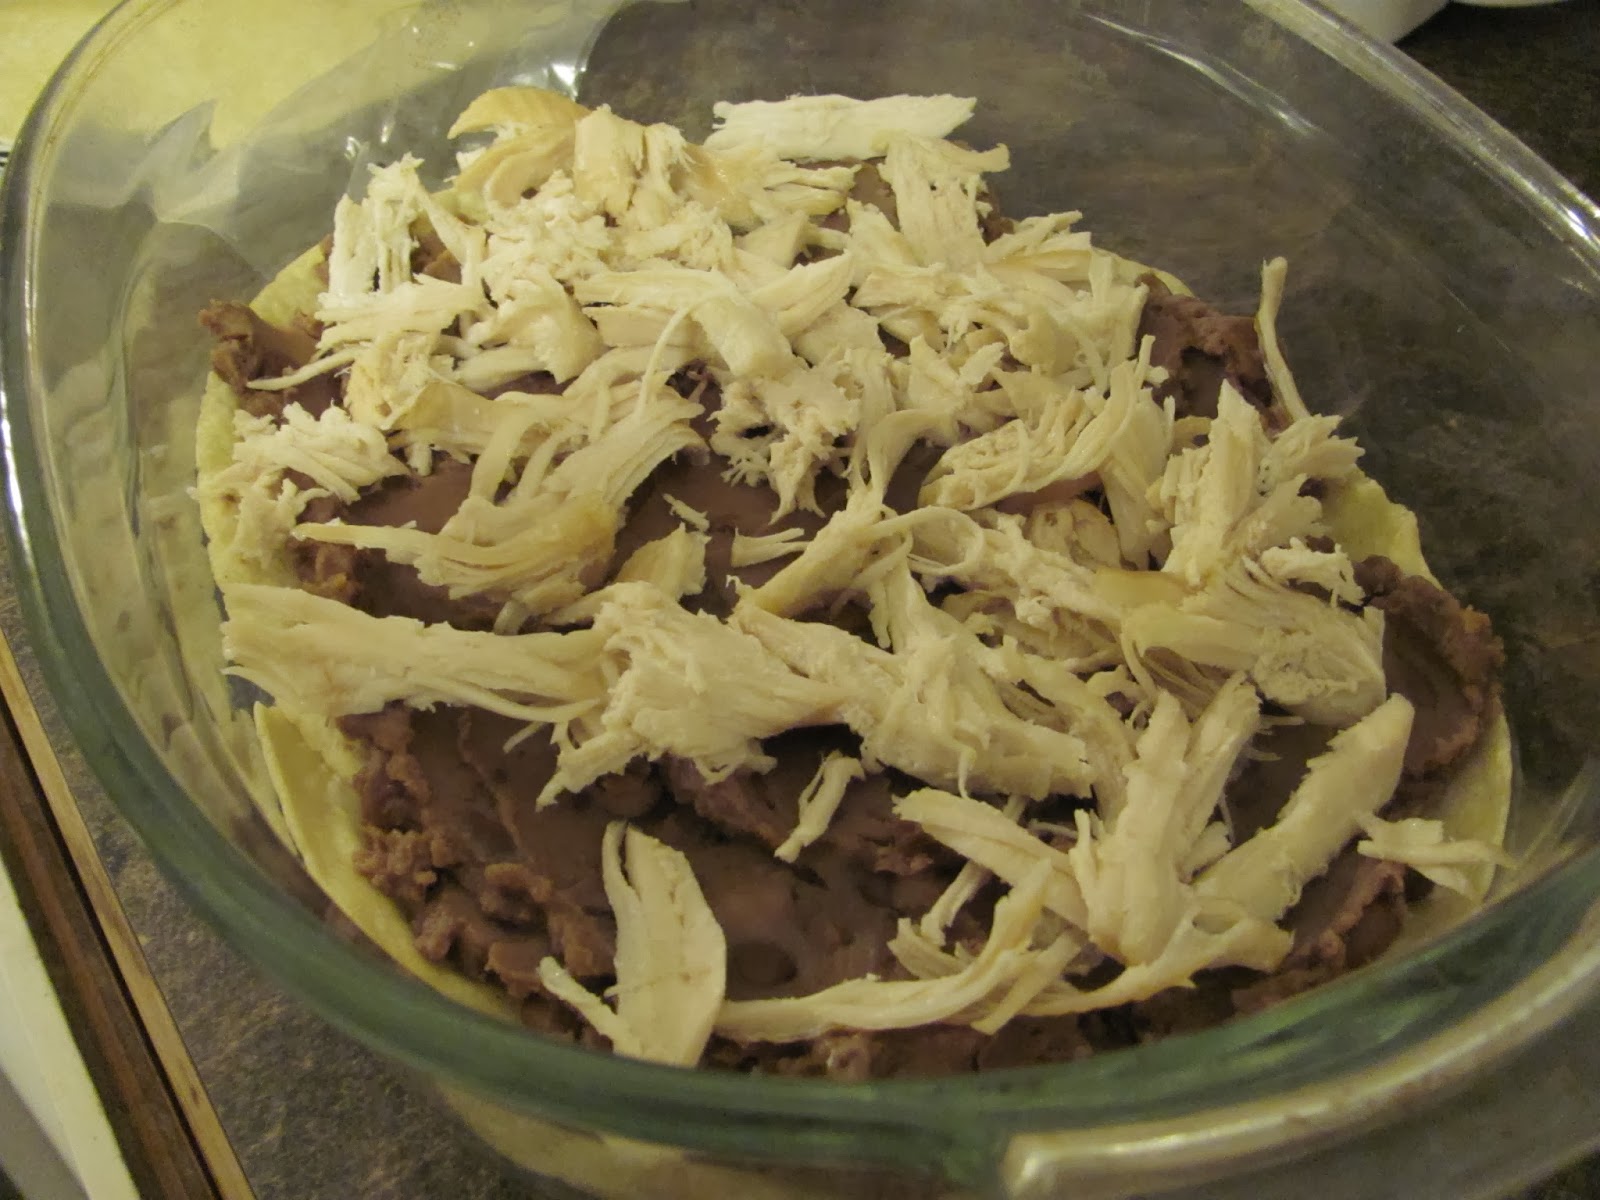
  3. Place two tortillas at the bottom of the dish.  You can overlap them to cover the entire surface.  Then layer beans, chicken, cheese, cilantro, onions, sauce, and tortillas, then repeat once.  This will make 2 layers.      
    • Make sure to keep some sauce and cheese to finish off the top of the casserole.
  4. Cover the top of the casserole with the remaining sauce and cheese 
  5. Bake for 35-40 minutes - golden brown and bubbling is what you want to see when you look in at it.
  6. Let the casserole rest for about 15 minutes once you remove it from the oven.  You can also garnish with green onions and cilantro at this point.

Sunday, August 4, 2013

Chocolate Chip Cheater

I love baking.  I love the process of bringing ingredients together to create a sumptuous and satisfying treat for friends and family.  Every so often, I just want something quick, really quick and easy, really easy.  I know you can relate.  Well, to satisfy chocolate chip cookie cravings (especially when a certain husband regularly devours the frozen dough balls kept back for craving emergencies such as these), I found this little gem of a recipe, "Single Serving Deep Dish Cookie" on the blog Love From the Oven.  My boys are eating it right now.  Devouring it would be a more accurate description.  The smell amazing.  The are sooooo quick and soooo easy.  I really feel like I'm cheating.  I'm a chocolate chip cheater and I'm okay with that right now. 

Go ahead and give in to my peer pressure.  Be a chocolate chip cheater with me tonight!!

Chocolate Chip "Cheater" Cookie


Ingredients:
2 Tbsp. butter
1 Tbsp. brown sugar
1 Tbsp. granulated sugar
1 tsp. vanilla extract
scant 1/4 cup of flour (I used white whole wheat)
1/8 tsp. baking powder
dash of salt
chocolate chips to sprinkle on top

Method:
**You can do this all in one mug or mix it in a separate measuring cup and "bake" in individual ramekins for a special treat.
1.  Melt butter
2.  Mix in sugars & vanilla
3.  Mix in flour, baking powder and salt
a la mode version
4.  Sprinkle with desired amount of chocolate chips
5.  In cup or ramekin, cook in microwave for 40 - 60 seconds, depending on your microwave and on how done you like your cookies.  With no eggs in this recipe, you could eat it raw and not worry!
**Serve with ice cream on top if desired 

Enjoy!!!

Click here for printable version

Saturday, July 27, 2013

Chocolate Cravings

I wanted chocolate.  Brownies sounded good, but the 4 boys in the house wanted cookies.  I decided Brownie Cookies would work.  I didn't like any of the recipes I found, especially the parts that involved chilling the dough overnight.  Not only did that not work for my chocolate craving, it DEFINITELY didn't work for the boys. The two older boys helped me create and mix together this delicious cookie concoction.  Warning, this is NOT a healthy recipe, but it is sooooo yummy! 

So to Gabe & Nathanael, thank you..... we developed a winner!


Brownie Cookies

Ingredients:  
1 cup of unsalted butter
2/3 cups of cocoa powder
2 cups of sugar
2 tsp. vanilla
3 eggs
3 cups of whole wheat or white whole wheat flour
1 tsp. baking powder
2 tsp. salt
confectioners sugar to shake over unbaked dough before baking - if desired.

Method:
Pre-heat oven to 350 degrees
Melt butter in medium saucepan.
Stir in cocoa powder, followed by sugar and vanilla.
Mix in the eggs until all is well blended.
In a separate bowl mix together the flour, baking powder and salt until it is well blended.
Combine the flour mixture with the cocoa mixture.
Mix well and drop by teaspoonful onto non-greased baking sheets
Shake powdered sugar over dough before baking, if desired.
Powder sugar dusted cookie


Yields approximately 3 1/2 - 4 dozen cookies.

Click here for printable version

Tuesday, February 19, 2013

Do you know the muffin man?

I had some bananas on the counter and they were not looking so lovely any longer.  That always means its time for some baking.  I rarely make banana bread.  I usually make the dough into muffins.  We find the single servings perfect in our household and they freeze great that way too (that is if they last long enough to freeze any - warm baked muffins tend to disappear rather quickly).  I wanted a muffin that had some "umpf" to it this time, so I took my basic go to banana bread recipe and went from there.  We were all extremely pleased with the outcome!  Best of all, they are pretty darn good for you too!

What are you doing with your bananas?

Banana-Oat-Quinoa Muffins
Ingredients:
 4 ripe bananas (the riper, the sweeter, the better)
1/4 cup brown sugar (optional depending on how ripe the bananas are)
2 large eggs
1 Tbsp. vanilla
2 cups whole wheat flour
1 cup oats (you can add them as whole flakes or pulse them in a food processor)
1 cup  quinoa (you can add them uncooked for a crunchy texture or add it cooked for softer texture)
1 tsp. baking soda
1 tsp. baking powder
1 tsp. ground ginger
1/4 cup bran

Method:
Cook the quinoa if you are going to go the cooked route.  It takes 2 cups of water per 1 cup of quinoa and generally 20 minutes.  If you are cooking the quinoa, you will yield 3 cups cooked for every cup uncooked.  Keep this in mind.  You'll only need 1 - 1/2 cups of the cooked quinoa.
Mash together bananas (I use my mixer and just add the ingredients as I go). 
Next add the sugar if you choose to add it - it's only needed if the bananas aren't very ripe.
Add the eggs and vanilla and mix well.
Mix cooked (if going the cooked route) quinoa into the banana mixture at this point.
In a separate bowl combine flour, oats, quinoa (only if going the uncooked route), baking soda, baking powder, ginger and bran.  Mix well.
Add dry ingredients to wet and mix well.
Spoon into muffin cups and bake at 350 for 25 minutes or until tops start to brown and look crunchy.

Enjoy!  They are super yummy!

Click here for a printable link

Monday, February 11, 2013

Quick & Delicious!

I was searching the time-void otherwise known as "Pinterest" for some new dinner recipe inspiration.  I came across this delicious sounding meal, "Thai Fried Quinoa".  I was nervous about the young one.  He is picky, but I've learned that it's best not to plan or cook around his taste buds, they change rapidly, with his mood.  So, with a few adaptations to fit our family - the older boy will NOT eat peas and since he's so good about eating everything else, I indulge this aversion.  I have to say, this meal was AH-MAZ-ING!  We all had seconds, which unfortunately resulted in no leftovers in my lunchbox tomorrow.  Boo!  This recipe is quick, simple and healthy.  The cooking goes really quick, so read through it first and have your ingredients ready to go.  I did not do these things and Mr. Filabuster (a.k.a. our younger son) decided to vocalize every thought in his head at the same time I was reading the recipe and cooking.  Thus my advice, read through it first and have things read.  That's what my frazzled brain was wishing I'd done.

Enjoy a big bowl of this healthy yumminess tonight!

Thai Fried Quinoa  
*Adapted from Iowa Girl Eats food blog
Ingredients:
1 cup quinoa, rinsed and drained
1 cup lite coconut milk
1 cup chicken broth
1 tsp. olive oil
5 green onions, chopped
2 Tablespoons minced ginger
2 Tablespoons minced garlic
1 cup frozen edamame
1-8oz can pineapple tidbits, drained
1/4 cup cilantro, chopped
4 eggs
2-4 Tablespoons soy sauce (I used 4 because we like the flavor)
juice of half a lime
chopped cashews or peanuts (optional)

Method:  
  1. Place rinsed quinoa in a saucepan over high heat. Add coconut milk and chicken broth and bring to a boil. Once boiling, place a lid on top, turn the heat down to medium-low, and cook until all the liquid has been absorbed and quinoa is tender.  It takes about 15 minutes.
  2. While the quinoa is cooking, heat a large skillet over medium-high heat and spray with olive oil (or add to pan and swirl to distribute evenly). Add green onions, ginger, and garlic and cook for 1 minute, stirring constantly so the garlic doesn't burn.
  3. Next add the edamame, pineapple tidbits, and cilantro and cook for 1 additional minute.
  4. Push the ingredients to the sides of the pan, creating a clear space in the center. Whisk the eggs together in a small bowl, then pour into the pan. Stir with a spatula until the eggs are scrambled, then stir to combine with the rest of the ingredients.
  5. Add cooked quinoa, soy sauce and lime juice to the pan, and stir to combine. Cook for an additional minute or two, or until the quinoa begins to crisp up. Serve with optional chopped nuts on top.
Click here for printable recipe

Wednesday, February 6, 2013

Sweet + Sour = Yum!

In England the term "hotpot" means a casserole topped with sliced potatoes.  I found this recipe for sweet and sour mixed bean hotpot in one of my vegetarian cookbooks.  The name did not entice me but, as often is the case, the picture most definitely did.  It looked delectable, warm and hearty.  It also looked relatively easy!  Always a plus on a work night!  So, I set about recreating the recipe to meet our families likes and specifications.  This made a terrific main dish for us, paired with some fresh fruit.  If you are a must have meat person, this dish would be a fantastic side.  It is FULL of flavor and texture!  Either way, it's a nice change of pace from the norm!  It does take a bit to bake, but the good news is that the prep is minimal and you can do other things while this takes its sweet time in the oven.

Sweet & Sour Vegetable Bean Hotpot
Ingredients:
2 lbs Yukon Gold Potatoes
1 Tbsp. Olive Oil
3 Tbsp. Butter
1/3 cup Whole Wheat Flour
1 1/4 cups tomato sauce
2/3 cup of pear juice (apple would work too, but I had pear on hand)
4 Tbsp. light brown sugar
1/4 cup ketchup
1/4 cup cider vinegar
2 Tbsp. soy sauce
1/4 cup Vodka (optional - the original recipe called for Sherry, but I only had Vodka on hand)
1 can navy beans
1 can butter beans
1 can chick-peas
2 cups green beans
1 cup shallots, sliced
3 cups sliced mushrooms
1 Tbsp. fresh thyme
1 Tbsp. fresh marjoram
salt and ground pepper

Method:
  • Preheat the oven to 400 degrees.  Thinly slice the potatoes and boil them for 4 minutes.  Drain the potatoes and toss them with the olive oil, making sure they are coated all over.  Set them aside.
 
  • Melt the butter and add the flour, tomato sauce, pear juice, sugar, ketchup, vinegar, soy sauce and vodka in a large saucepan.  Heat gently while whisking until sauce begins to boil and thickens.  Simmer for 3 more minutes, stirring continuously.
 
  • Rinse and drain the beans and chick-peas and add to the sauce, along with all remaining ingredients.  Stir together, mixing well.
 
  • Spoon the bean mixture into baking dish.
 
  • Arrange the potato slices over the top of the bean mixture, overlapping them slightly, until the entire bean mixture is covered.
 
  • Cover with foil and back for 50 minutes, then remove foil and bake for an additional 20-25 minutes, until potatoes are golden.
Click here for printable recipe

Saturday, February 2, 2013

Dreaming Of Summer

Lately it's been rather cold and dreary here in the Northwest.  I enjoy all the seasons, but so many days of cold has left me dreaming a bit of warmth and the joys that summer brings.   One of those joys is fresh vegetables from the garden.  In my early growing up years, we lived out in the country in Southern Illinois and we had a huge garden.  One of our staple summer meals was spinach salad.  Really, this salad can be a side, but we loved it as a main dish.  Nothing is better on a hot summer evening than a big bowl of fresh, cool salad.  This salad can be tweaked however you need it to be; healthy, meatier, meatless......  I love it just the way my mom used to make it for us.  Be aware, you must eat this the same night, it's not nearly as good the next day.

Bring some summer dreams into your home tonight.


Spinach Salad 
Ingredients: 
2 bunches fresh spinach, washed & stems removed
4-5 boiled eggs, sliced
1/2 lb of bacon, cooked and sliced or broken up
1-2 bunches of green onions, sliced (depending on your love for onions)
For the dressing:
1/2 cup olive oil
1/4 cup vinegar (your favorite kind, but not balsamic)
1/4 cup sugar
1 Tbsp Worcestershire Sauce 
3 Tbsp. ketchup
dash of garlic salt/powder

Method:
  • Mix together ingredients for the dressing and shake well.  I usually use a mason jar.
  • Lightly toss all ingredients for the salad.
  • Either drizzle dressing over whole salad, or individual salads.
**Roasted sunflower seeds make an excellent substitution for the bacon if you are looking for a meatless alternative!
 
Enjoy!!!

Click here for printable recipe   
 

Friday, February 1, 2013

Easy Lasagna

My older son LOVES lasagna.  I don't really like making it much.  Lots of steps, lots of time involved.  I LOVE easy crock-pot meals.  I found this recipe for crock-pot lasagna and it felt like a match made in heaven.  I tried it out last night.  I was very low on energy and in this recipe I didn't even have to cook the noodles first!  I was hoping this worked out well.  I was concerned because you wouldn't get the crusty cheese top.  Would it be as good?  Would it be too liquidy?  Wait!  I didn't have enough of the thick sauce and now have to substitute my own homemade sauce, but it's thinner!  I did it anyway.  It was smelling great and looking great.  Now for the true test, taste!  It was winner all over.  This is the crusty cheese kind, but this is the melty goodness that satisfies in every way.  My sister also gave me a great idea when we discussed this recipe today.  You could use a kitchen torch (ala creme brulee) to get that nice crusty cheese on top!!!

Dive into this cheesy goodness soon!!

Crock-pot Lasagna

Ingredients:
12 whole wheat lasagna noodles
2 large jars pasta sauce (your favorite - thicker is going to make for a thicker lasagna, thinner is more soupy)
2 16-ounce containers of small curd cottage cheese (or ricotta)
2 eggs
1 10-ounce package of frozen spinach
2 tsp. ground nutmeg
1 package spaghetti sauce spice mix (this is optional, but I really liked the flavor it added)
1 cup shredded Mozzarella Cheese
1/2 cup shredded Parmesan Cheese

Method: 
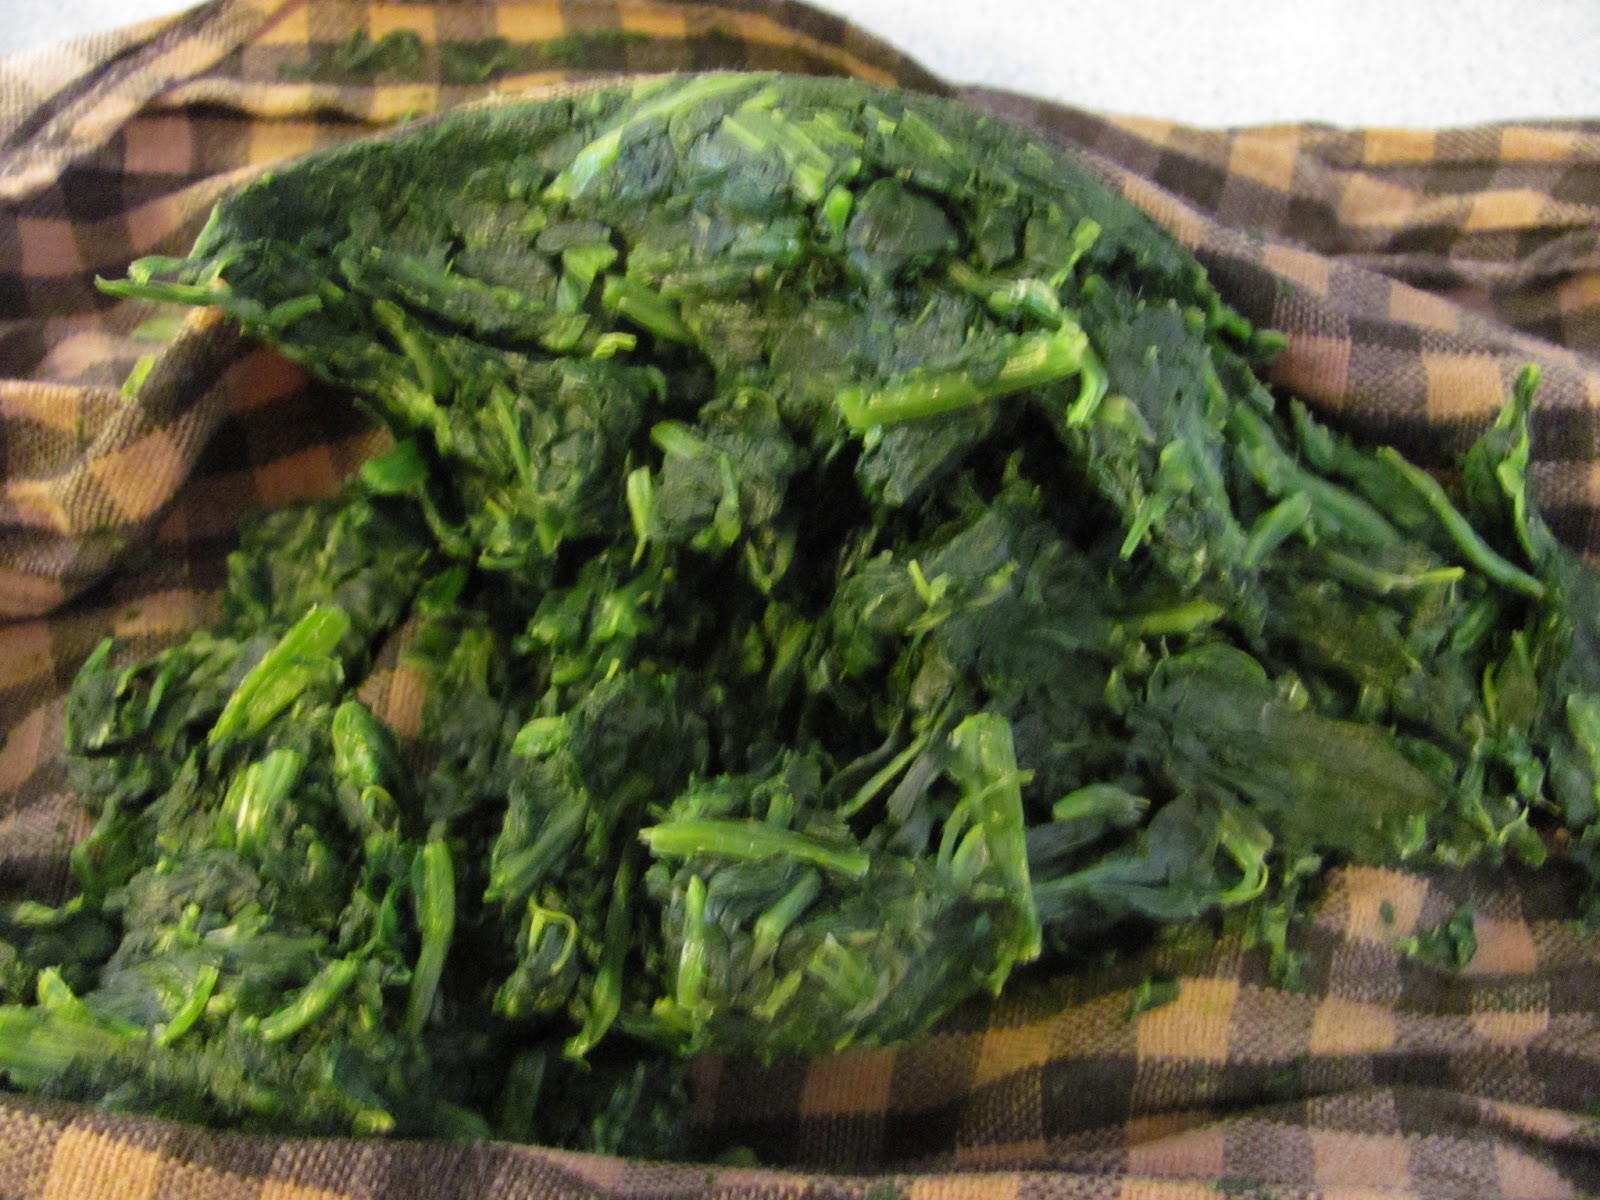
  • Thaw spinach in microwave (2 minutes on high) and then squeeze out extra liquid using a kitchen towel.
 
  • Mix together cottage cheese/ricotta, eggs, nutmeg, spaghetti sauce, spinach, 1/2 cup of Mozzarella Cheese and 1/4 cup of Parmesan Cheese.
 
  • Layer 1 cup pasta sauce at the bottom of the crock-pot. Next layer 4 lasagna noodles (breaking as needed).  Now 1 more cup of sauce, then the cheese-spinach mixture.  Then another layer of 4 noodles and another cup of sauce and then the remaining  cheese-spinach mixture.  Top off with 4 more noodles and the remainder of the sauce.  
 
  • Place the lid on the crock-pot and cook on low for 5-6 hours (I did 6).  
  • In the last 10-15 minutes add the remaining cheese.  Cover and cook until ready to serve.


Enjoy with a nice salad and some crusty French bread.

Click here for printable recipe