Kitchen Creations

Sunday, December 9, 2012

It's a crockpot kind of week.


Crockpot meals can be life savers.  I'm picky about them though.  I'm not a big fan of crockpot recipes that involve cream of something soup and I really don't like having to brown meat or cook anything before-hand.  I guess I'm a bit lazy, but I just want to put it in the pot and have it cook and come out warm and yummy for dinner that night - no muss, no fuss (or minimal muss and minimal fuss).  This recipe is definitely in that category!  It's easy to put together, minimal steps are involved and the result is very, very tasty.  Pair it with a nice salad and some tortillas or tortilla chips and you have a nice and easy, well balanced meal!

Take it easy tonight with this pleasing crockpot meal.


Southwestern Crockpot Chicken   
Ingredients:
2 cups fresh or frozen corn (I now leave this out because my oldest does not like corn, except on the cob)
1 can black beans (or 1 1/2 cups if you make your own)
1 onion, finely chopped
2 cloves garlic
2 large breasts of chicken (boneless/skinless)
1 16 ounce container of your favorite  medium heat salsa (we also like to use a jar of my husband's homemade salsa verde) - medium heat is important for flavor, mild heat does not give enough flavor
1 tsp. ground cumin
1 tsp. paprika
*** I added 1 pkg of 1/3 less fat cream cheese (cubed) once and it made it deliciously creamy
*** Garnish:  Shredded Cheese, Avacado, Sour Cream, Chopped Green Onion, Shredded Lettuce...... use your imagination!

Method:
Add corn, rinsed beans, onion, garlic, cumin and paprika to the crockpot.  Mix together.
Next lay the chicken breast on top of the corn/bean mixture.
Now add the cream cheese (if using)
Pour salsa over the mixture
Cook on high for 1 hour and then turn to low for 4 hours.
Then shred the chicken with forks.
Serve with tortillas or tortilla chips and all your favorite toppings!

Click here for printable recipe


Monday, October 1, 2012

"Raw" Goodies!

These next two recipes originally come from a variety of different sites, including A Couple Cooks and Shutterbean.  I have been searching and trying various recipes in order to discover great and healthy lunchbox alternatives for our family, since we all pack our lunches everyday.  Granola bars from the store are fantastic in size and are highly transportable.  However, they are fantastically full of ingredients I don't want in my body or my the bodies of my family!  The trick has been to make homemade versions of granola and energy bars that transport as well.  This is much harder than it sounds.  I've had some great tasting granola that doesn't hold together well enough for my boys to eat easily at lunch.  I had good success with a homemade granola bar not too long ago, which I posted here, Toasty Oat & Fruit Bars.  I now wanted variety!  I found it in these two goodies.

Viva Variety!

Raw Brownie & Apricot-Coconut Energy Bites

Apricot Coconut Energy Bites 
Ingredients:
1/2 cup raw almonds
1 cup dried apricots
1 cup shredded coconut, toasted
1/3 cup rolled oats
2 Tbsp. agave nectar
3 Tbsp. sesame seeds
1/2 tsp. ground ginger

Method:
1.  Process almonds in food processor until finely ground and set them aside.
2.  Place dried apricots in the food processor and process until finely chopped - about 2-3 minutes.
3.  Add coconut, oats, agave nectar, sesame seeds and ginger.
4.  Process until it all binds together and add in almonds.
5.  Process until well combined
6.  Roll mixture into balls and store in the freezer in an air tight container.

Raw Brownies 
Ingredients:
1 cup walnuts (unsalted)
1/2 cup cocoa powder
1/8 teaspoon kosher salt or sea salt
1 1/4 cups Medjool dates (about 12)
1/4 cup almonds (unsalted)
Cinnamon

Method:
1.  Pit the dates, set them aside.
2.  Process the walnuts in the food processor until nuts are finely ground.
3.  Add the cocoa powder  & salt and pulse to combine.
4.  Now, while food processor is running, add dates one at a time.  Once the dates are incorporated the dough should be crumbly yet form-able
5.  Now throw in the almonds and pulse to combine.
6.  Now you can form the brownies.  You can press them into a pan, roll them into balls or shape them into cubes. 
7.  Place them into the fridge or freezer for 5-10 minutes then sprinkle with cinnamon, if desired.
8.  If in a pan, then cut.  I put the balls &/or cubes in a container and store them in the container.

Click here for printable version


Hurry and get some curry!

This is another great recipe I discovered while prowling through other food blogs.  This one comes from one of my favorite blogs, A Pinch Of Yum.  You really should check it out.  There are some amazing recipes on there!  Since Indian food is one of our all time favorites, I thought I try this out.  All the guys loved it and it met with the meatless bent I've been going for.  However, we all commented that adding chicken would be VERY tasty too.  Nothing in this recipe is hard, but cooking the lentils and rice is time consuming, so make sure you leave yourself enough time for that.  The red curry paste is a MUST!  The first time I made this I had garam masala on hand, then second time I didn't.  I'm going to give the ingredients I used to replace garam masala because I'm guessing you all have those on hand, while garam masala might not be so readily available.  (I couldn't find it ANYWHERE at Fred Meyer.)

Hurry and get some curry tonight!


Red Curry Lentils
*Original recipe from A Pinch Of Yum
Ingredients:
* 1 1/2 cups dry lentils
* 1 bay leaf
* 1 clove garlic, minced
* 1/4 cup finely chopped onion
* 5 cups water
* 1/2 a large onion, diced
* 1/2 tsp. cumin
* 1/4 tsp. ground coriander
* 1/4 tsp. ground cardamom
* 1/8 tsp.  cinnamon
* pinch of nutmeg
* pinch of cloves
* 1 tsp. curry powder
* 1/2 tsp. turmeric
* 1/2 tsp. sugar
* 1 tsp. minced garlic
* 1 tsp. minced ginger
* 1/4 tsp. cayenne pepper
*  1 14 ounce can of tomato puree (or just puree a bunch of tomatoes from your garden)
* 1/4 cup coconut milk
*  cilantro for garnish
*  brown rice for serving

Method:
1.)  Bring 5 cups of water to a boil.  Add lentils, bay leaf, 1 clove minced garlic & 1/4 cup chopped onion.  Simmer for 45-50 minutes.  Drain, then set aside.

2.)  Melt butter, add the onion and saute for about 5 minutes.
3.)  Add all spices, including curry paste.  Stir-fry for 1-2 minutes, stirring constantly.
4.) Add tomato sauce and stir and simmer until smooth.
 
5.)  Add the lentils and coconut milk.  Stir and simmer another 15-20 minutes.


6.)  Garnish with cilantro and serve over brown rice.

Enjoy!


Click here for printable recipe


Monday, September 24, 2012

Harbinger Of Fall

This past Saturday brought the beginning of my favorite season.  I have been looking forward to fall since I packed away the fall decor last year.  I love this season.  I love the cooling of the air, the golden sun light, the brisk breezes, the apples, the spices, baking, oh did I say apples, pumpkin, scarecrows,  pumpkin spice lattes (which my husband refers to as "harbingers of fall"), oh and apples!!  I have been looking forward to this post for a few weeks because this fall brought with it a challenge from my friend Joy involving creating a similar tasting, yet significantly healthier version of Starbuck's pumpkin spice muffin.  It involves spices, pumpkin, baking and a challenge.... she had me from the get-go. 

I had a few small problems to start with....
1.  I had never tasted the original version before.
2.  I took a quick look at a copycat recipe on-line and nearly died when I saw the ingredients.  Two cups of oil and 2 cups of sugar were NOT going into these babies!
3.  I had to find taste testers.

I sat down and planned out how to reduce oil and sugar and keep the muffins from being to dry and too blah.  Taste testers presented themselves readily and willingly.  Only one problem was left and I decided to embark on this challenging journey with no gustatory comparison what-so-ever.  Smart? Perhaps not. Exciting and nerve-racking? Definitely! Really, that's what a cooking/baking challenge is all about.  I couldn't wait to bake them and sit back, while biting my nails, as others tested them.   I was very lucky to have two "professional taste testers", highly qualified in sampling baked goods, two former Starbuck's baristas, the lovely Chelsea & Austyn!!!

They were baked, they were agonized over and they were sampled.  My friends, they were also.....winners!!!

Pumpkin Spice Muffins  
Ingredients:
   Muffin
3 cups white whole wheat flour
1/4 cup wheat bran
1/4 tsp. cardamom
1 Tbsp cocoa powder
2 tsp. ground nutmeg
2 tsp. cloves
2 tsp. cinnamon
1 3/4 tsp. ground ginger
1 tsp. salt
1 tsp. baking soda
3 1/2 cups pumpkin
1/2 cup applesauce (no sugar added)
3 Tbsp. molasses
1 Tbsp. vanilla extract
1 cup brown sugar
3 eggs
     Candied Nuts or Pumpkin Seeds
2 Tbsp Honey
1/3 cup pecans, walnuts or pumpkin seeds
1/2 tsp. vanilla extract
1/4 tsp. each of ginger, cinnamon, cloves & nutmeg
     Cream Cheese Filling
1 pkg. Neufchatel (1/3 less fat) cream cheese, softened
sprinkle in a pinch of each ginger, cinnamon, cloves & nutmeg
1 Tbsp. vanilla extract

Method:
1.  Mix dry ingredients for muffins together (flour through baking soda on the ingredients list).
2.  In a separate bowl mix pumpkin, applesauce, molasses, vanilla, brown sugar & eggs together.
3.  Add dry ingredients to wet and combine.
4.  In a small saucepan, heat honey and vanilla until honey is smooth and liquid-like.
5.  Add spices to honey/vanilla mixture and mix.  Then add nuts.  Stir constantly for 1-2 minutes on med-high heat.  Nuts should be coated with mixture.  Remove from heat.
6. Spoon muffin mixture into muffin cups/tins.  Sprinkle candied nuts/seeds on top.
7.  Bake at 350 degrees for 25-30 minutes - until toothpick comes out clean.
8.  While muffins back, combine cream cheese, spices and vanilla - you can add a bit of confectioners sugar here too.
9.  Once muffins cool a big, use a pastry bag/decorators bag and large tip to insert cream cheese mixture into muffins and dollop on top.  OR simply use as a "frosting".
10.  ENJOY!  They are pretty good for you!

Click here for printable recipe

Tuesday, September 4, 2012

Cookie Dough!


One of my husband's favorite treats in the WORLD is cookie dough.  When I make extra dough and freeze the dough in balls in the freezer, I'm lucky to ever get to bake any of them.  When my friend Stacy told me about these little beauties, I went home and got to work.  I didn't have all the correct ingredients, so I made do with what I had on hand.  They turned out really great.  So good and good for you!!!  I don't know if I'll ever make "real" cookies again.  Well, probably not, but these are definitely around to stay!

Cookie Dough In The Raw! 
Ingredients
1 1/3 cups almonds
2/3 cups oats
1/2 tsp. ground cinnamon
1/4 tsp. ground ginger
1/8 tsp. sea salt
1/4 cup of honey
2 tsp. vanilla
3-4 Tbsp. dark chocolate chips

Method:
1.)  Combine almonds, oats, cinnamon, ginger & salt in food processor until mixture is fine.
2.)  Add honey & vanilla and process to combine.
3.)  Add the chocolate chips and process to combine.  Process longer to make a more "chocolatey" dough, less for chocolate pieces in the dough.
4.)  Roll the mixture into little balls (about 1 tsp. each) and place on a cookie sheet lined with parchment paper or wax paper.  Place in the freezer for 30 minutes to firm up.  Then store in the freezer inside a closed container.

Click here for printable link


Wednesday, August 29, 2012

.....and we all said YUM!


Okay, so I was feeling in a rut and decided to go on-line and find some new inspiration for meatless meals this week.  This in addition to starting back to work this week has been interesting.  It is always nice to get kind of lost in the world of creating my art, food.  This was the perfect recipe for that.  I discovered it on a great site, A Couple Cooks.  This is by far one of my newest favorite sites to visit.  Vibrant food, taste-wise and visually!  Anyway, I digress. This recipe..... it was perfect.  I took the suggestion within the directions given by the "couple cooks" and turned on some music and just enjoyed.  There is some chopping involved, but nothing is hard about this and it is one of those meals that feels good to make.  Good ingredients, great smell, visually stunning.  I gathered everything, chopped with my favorite tunes and then put it all together and fell in love with my counter full of ingredients.  I guess I'm weird that way.
Well, the love just grew and grew as the ingredients combined to create amazing aromas throughout my kitchen and home.  I think I'm going to rename this dish, For the Love of Paella because we all fell in love it, even my little Mr. Picky!

Fall in love with some great food tonight!

For the Love Of Paella a.k.a. "Simple Vegetable Paella"
***Adapted from A Couple Cooks website   
Ingredients:
4 cloves garlic
One large sweet onion
8 ounces baby portobello mushrooms
One or two small bunches chard (enough to make two cups chopped)
1 can quartered artichoke hearts (in water, not oil)
1 1/4 cups arborio rice
2 1/2 cups vegetable broth
1 15-ounce can fire-roasted diced tomatoes
1 cup chickpeas (canned or cooked)
2 tablespoons olive oil
1 tablespoon paprika
1 teaspoon turmeric
1 teaspoon kosher salt
Fresh ground pepper

Method:
1.  Gather all your ingredients.
2.  Mince your garlic, chop your onion, slice your mushrooms, wash & chop your chard and drain your artichokes!
3.  Measure out the rest of the ingredients and open any cans.  Bring it all to where your large skillet is.
4.  Heat the olive oil in a large skillet.  Saute onions, garlic and mushrooms until tender (about 5 minutes)
5.)  Add the 1 tablespoon of paprika, 1 teaspoon of turmeric and the rice.  Stir together in skills for about 1 minute. 

6.)  Add the can of fire-roasted tomatoes, Swiss chard and chickpeas, salt & loads of ground pepper!

7.)  Pour in the vegetable broth, enough to fully cover the vegetables and rice.  Make sure it totally covers the rice or you'll end up with crunchy bits of rice here and there.  Arrange the artichoke heart quarters over the top.

8.)  The broth should be brought to a boil.  Once it boils turn down to a simmer and let it all hang out for about 40 minutes. 
9.)  Once the liquid has absorbed or cooked out, remove from heat and let sit for a few minutes.  More liquid absorbs in these minutes.  Do not let it cook too long or it can burn.

Enjoy!!!

Click here for printable recipe

Monday, August 27, 2012

Tasty, healthy & EASY!

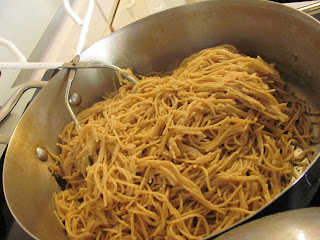
I have a Rachael Ray cookbook that I love, it's called Express Lane Meals.  It's got three different sections; "Meals for the exhausted", "Meals for the not too tired" and "Bring it on! (but, be gentle).  This recipe comes from the "meals for the exhausted" section, so that should clue you in to the difficulty level.  She calls it "Cacio e Pepe (Cheese & Pepper Pasta) and Spinach with White Beans.  I call it just plain GREAT!!  The ingredients are simple and the method is easy.  On top of simple and easy, it tastes fantastic.  I have a picky eater in my house.  He'd be happy if I made him nachos or peanut butter and jelly sandwiches every night.  This pains me, to say the least.  He is not usually very excited about the new dishes I make.  He has to take his "no thank you" bite though.  (You must take a bite and try it before you can say "No thank you" to it.)  Last night he was excited about the "noodles" and his excitement turned to joy, his and mine, when he returned for 2 extra helpings of this meal!  My other boy loves just about anything and eats heartily.  He went for 3 rounds as well.  This meal will now be in the weekly rotation.  It's tasty, healthy and above all, EASY!!

Enjoy some of this simple goodness tonight with your family!

Cacio e Pepe (Cheese and Pepper Pasta) and Spinach  with White Beans 
*From Rachael Ray's Express Lane Meals cookbook
Ingredients:
Salt
1 pound thin spaghetti noodles
3 Tbsp. butter
5 Tbsp extra virgin olive oil
2 tsp. coarse black pepper
1 cup grated Pecorino Romano cheese
1 10-ounce box of chopped frozen spinach
4 garlic cloves, chopped or minced
1 14-ounce can cannellini beans, rinsed and drained
1/4 tsp. ground nutmeg

Method:

  • Bring a large pot of water to boil.  Salt the water and add pasta to boil (according to package directions - about 6 minutes).
  • ***You'll want to save 2 ladles-ful of the pasta water before you drain it!!!  Don't forget
  • While pasta is boiling, place a large skillet over low heat and place butter and 1 Tbsp. of the olive oil and pepper into it.  Let this slowly melt until the pasta is done.
Yummy!!

  • Also while pasta is boiling, defrost the spinach in the microwave for 6 minutes on high. 
  • Heat a small skillet over medium heat.
  • Add 2 Tbsp. olive oil, then the garlic, cook garlic for 2 minutes.
  • Now add the beans to garlic. 
  • Next add the spinach to the beans, breaking it up as you drop it into the pan.

  • Season the spinach and beans with nutmeg, salt and pepper
  • When the pasta is done remember to reserve 2 ladles-ful of the pasta water and add 1 ladle to your melted butter-pepper mixture.
  • Drain the pasta and toss it in the pan with the butter, pepper, pasta water sauce.
  • Turn off the heat and add the cheese in small handfuls, tossing with tongs until all the cheese in incorporated.  It will form a creamy sauce to coat the pasta.
 

  • Add another ladle of cooking water if needed (I add the 2nd ladle every time).
  • Now season the pasta to taste with salt and drizzle with 2 Tbsp. of olive oil.
  • Serve the pasta and spinach-bean mixture side by side (although, mixing them also tastes great!!)       
Enjoy!


Click here for printable recipe.


Wednesday, July 11, 2012

Cooking Lessons

I've started giving my boys cooking lessons.  They enjoy being in the kitchen and both really love creating something good to eat.  I consider it my gift to my future daughters-in-law.  Husbands that cook yummy stuff for them and love doing it.  That's my goal.  It doesn't hurt that at the same time they work on reading skills, following directions and math (fractions).  All in all, it is something we enjoy doing together with a pretty sweet outcome!  Today's cooking lesson featured fresh raspberries from my friend Stacy's yard.  
Look at these beauties!
 I found a recipe for fresh strawberry yogurt cake on a great food blog, A Spicy Perspective., and with a few alterations we had a delicious raspberry yogurt cake to indulge in this afternoon. 

In honor of my "chef" sons, I give you "Raspberry Delight" - their name for it.

Raspberry Delight 
Ingredients:


  • 1 cup (2 sticks) butter, softened
  • 1 1/2 cups brown sugar
  • 2 eggs
  • 3 Tb. lemon juice, divided (half in the cake batter & half for the glaze)
  •  1 1/2 tsp. vanilla extract   (1 tsp. in the cake batter and 1/2 tsp. in the glaze)
  • 2 1/2 cups white whole wheat flour
  • ½ tsp. baking soda
  • ½ tsp. salt
  • 1 cup of vanilla flavor greek yogurt
  • 2 1/2 cups fresh raspberries
  • 1 cup powdered sugar


  • Method:
    • Preheat oven to 325 degrees. Grease and flour a 10 inch Bundt pan 
    •  Combine 2 1/4 cups of flour with baking soda and salt and mix well.
    • In a seperate bowl cream together the butter and brown sugar.
    • Add eggs, 2 Tbsp. of lemon juice and 1 tsp. vanilla extract to the butter and sugar. Mix well.
    • Add 1 cup of yogurt to the batter and mix well.  Then add flour mixture and combine until all ingredients are just incorporated (don't mix to much or too long).
    • Toss the raspberries with the remaining ¼ cup of flour. Fold gently into the cake batter.
    • Pour the batter into the Bundt pan. Bake in the preheated oven for 60 minutes.  At this point a toothpick inserted in the center should come out clean.       
    Here it is, cookin' away!
    •       Place on a wire rack and let cool for 20-30 minutes.
    Golden on the outside
    • 9.   Once the cake has cooled whisk together the remaining 1Tb. of lemon juice, 1/2 tsp. vanilla extract and the powdered sugar. Drizzle over the top of the cake.


    Click here for printable recipe.

    Monday, July 9, 2012

    Sharing The Love

    Oh how I've missed posting on my blog!  I'm enjoying the summer and the slower pace of life it brings.  Our garden is producing like crazy and we harvested our first 4 blackberries (out of hundreds!) last night.  Honestly, I don't think you can beat Yakima in the summer (or the spring, or the fall, or the winter for that matter - I guess I love it here!).  The other thing Yakima seems to be producing alot of lately is babies, at least in our church!  This post is about the meal that is quickly becoming one of my standard "new arrival" meals to the family.  We love it and it's easy, transportable and FULL of delicious flavor.  I found it, thanks to my "Darling" friend Regina, in a Rachael Ray cookbook.  Regina marked this one with a note, as she did all her favorites.  I know I would have loved it anyway but there is something emotional and special about making recipes that are shared favorites with someone you love.  So now I make this to share my love with others around me.  It just feels so right.

    Share the love with your family tonight!

    Pasta in Vodka Cream Sauce  
    **Adapted from in "Classic Rachael Ray 30 minute meals - The All Occasion Cookbook"
    Ingredients:
    Salt & Pepper to taste
    1 box of your favorite pasta - I typically use whole wheat penne or elbows
    1 Tbsp. of extra virgin olive oil
    1 Tbsp. butter
    2 cloves of garlic, minced
    1 shallot, minced
    1 cup vodka
    1 cup chicken broth
    1 can (28 ounces) of crushed tomatoes
    1/2 cup cream (you can use heavy cream, half and half, or even milk in a pinch - I've used them all)
    20 leaves of fresh basil, torn
    1-2 chicken breasts - baked (if desired - This can make the meal a bit heartier if you need meat.  We enjoy it both ways.)

    Method:
    Boil water in a large pot over high heat.  When water comes to boil add salt and pasta.  Cook according to length on package directions.
    While pasta is cooking, heat a large skillet over medium head.  Add the olive oil, butter, garlic and shallots.  Saute for 3-5 minutes.  Add vodka and cook to reduce by half.  This usually takes at least 3-5 minutes.  You'll see that it's not as liquidy in the pan and the strong smell of alcohol no longer threatens to choke you as you stand over the pan.  This is a really important step.  If you don't let it reduce enough your sauce will NOT taste good. 
    Once vodka is reduced, add the childen broth and tomatoes.  Allow the sauce to begin to bubble, then reduce the heat and simmer.
    Season with salt and pepper.
    Stir in cream and return sauce to a bubble. 
    This sauce is sooooo yummy!
    Once the sauce bubbles, remove it from the heat and toll in the hot pasta, chicken (if desired) and torn basil leaves.  Serve immediately with a sprinkling of parmesan cheese if desired!


    Click here for printable recipe.

    Sunday, July 8, 2012

    It's Berry Good!

    One of the best parts of summer are the berries.  Blueberries, raspberries, blackberries!!!  I love berries.  I've also discovered I love them with rhubarb and peaches, some of the other wonderful "plants" of summer!!  I had rhubarb, peaches and blackberries still in my freezer from last summer and needed to clear them all out for the next crops coming in.   What's a girl to do???  Make a crisp of course, a peach-rhubarb-blackberry crisp to be exact.  In case you are wondering, there were no recipes for this particular flavor combination, until now!!!  I looked through about 50 different "crisp" recipes and combined some of the ideas I found their with some from my own imagination and came up with this delectable recipe.  My small group Bible study got to taste test again and they were all pretty happy with it, including one of our favorite 2 year olds - Lewis!
    Lewis chowing down. 
    The helmet was my boys' idea, to keep Lewis safe from injury.
      So have some tonight, you'll be licking your lips like Lewis!

    Peach-Rhubarb-Blackberry Crisp 
    Ingredients:
      Filling:
    1/2 cup brown sugar
    5 Tbsp. all purpose flour
    1/2 tsp. nutmeg
    1/2 tsp. ground ginger
    1/8 tsp. salt
    3 cups frozen or fresh rhubarb, sliced 
       (Note: If the rhubarb is frozen you'll want to thaw it completely and drain in a colandar, but don't squeeze the liquid out of it.)
    2 1/2 cups frozen or fresh peaches, sliced
    2 cups frozen or fresh blackberries
      Topping: - I double this topping because I like LOTS of yummy crunchiness on top! I'm giving 
      you the single batch version in case you like sparse topping or to play with the amounts yourself.
    1/2 cup flour (I used white whole wheat)
    1/2 cup old fashioned oats
    1/2 cup packed brown sugar
    3/4 tsp. ground cinnamon
    1/4 tsp. ground ginger
    1/8 tsp. salt
    7-8 Tbsp. butter, cubed

    Method:
    Pre-heat oven to 350 degrees.
    Combine all ingredients for filling in a large bowl and mix well.
    Transfer to a 9X13 baking dish.
    Love all the vibrant color in this dish!

    In a separate bowl, combine the flour, oats, sugar, cinnamon & salt.  Mix well.
    Add in the cubed butter and mix with fork or fingers until the mixture is wet but still crumbles.  (This is a thicker crumble on top).
    Crumble topping over berry/peach/rhubarb mixture.
    This topping is so good I could eat it by itself!

    Bake at 350 for 40 minutes - or until top is golden and fruit mixture is bubbly.


    Click here for printable recipe.


    Saturday, July 7, 2012

    A real and healthy alternative

    I have been wanting to make my own granola bars for some time now.    I don't like buying boxes of food with a multitude ingredients I can't pronounce and sugar content that makes me wince.  Granola bars, as we know them, are glorified candy bars, in my humble opinion.  Yet, what is the easiest thing to stick into that sack lunch I make for my oldest, my husband and myself?  Yep, you got it and so I continue this cycle and feel horrible everytime!!!  Enough already!!  I want to feel good about what I'm putting into my kid's bodies and my own!
     A few weeks ago while at my friend Amy's, I tried her first attempt at homemade granola bars and they were delicious.  We both talked about wanting a recipe that was more chewy than crunchy, which equals far less mess with kids (or adults) around.  I came across this chewy looking granola bar on the blog "Can you stay for dinner?"  I added a few things and tweaked a few others (I am me after all) and my boys helped me put this recipe together in their first of "Mama's summer cooking classes".   It was easy enough for my 5 and 8 year old to follow (with some help from Mom) and so incredibly tasty and CHEWY!!!  These bars BEND folks!!  So if you are looking for a healthy & tasty alternative to snack bars full of high fructose corn syrup, processed grains and sugars galore look no further, this is your bar!  With oats, nuts, wheat bran, dried fruit and honey, you just can't go wrong!

    Toasty Oat & Fruit Bars 
    Ingredients:
    3 cups old fashioned rolled oats
    1 cup sliced or ground nuts (your favorite - I used almonds)
    1/4 cup wheat bran
    1 cup dried fruit (I used cherries & craisins)
    3 Tbsp. sesame seeds
    2 Tbsp unsalted butter
    3/4 cup honey
    1 1/4 tsp. vanilla extract
    1/2 tsp. salt
    cinnamon, nutmeg and ginger added to own desired tastes (optional)

    Method:
    Pre-heat oven to 350 degrees.  Line 9X13 pan with foil and spray foil with oil or cooking spray.
    Spread oats over large baking sheet and toast for 10-15 minutes.
    After oats toast, reduce temperature to 300 degrees.
    Pour toasted oats into a large bowl.  Mix in nuts, wheat bran, dried fruit and sesame seeds.
    Melt butter in small saucepan over medium heat.  Add honey, brown sugar, vanilla, salt and spices (if desired). 
    When butter mixture boils, remove from heat and pour over oat mixture.
    Mix well and pour into prepared 9X13 pan.
    Wet your hands and press mixture into pan evenly.
    Bake at 300 for 25 minutes (until top is golden).

    Allow bars to cool for at least 2 hours before cutting.  I turned them over on a cutting board and peeled off the foil then cut into desired size.


    Enjoy!!


    Click here for printable recipe.

    Wednesday, May 2, 2012

    More Blueberries!

    Sadly, this is my last post about blueberries for a bit.  I have used up the last of these frozen wonders from last summer.  The good news is that there will be plenty more to come since we've just planted our own blueberry patch!!  Woo-hoo!  I love all the things we are able to grow here in this beautiful valley and the huge yard God has blessed us with.  Although this is the last of the blueberry recipes  for awhile, it's a great one to end on.  This was originally called a "breakfast cake", but I think it's too sweet for that, so we're just going with dessert on this one; small group dessert to be exact.  When I found the recipe at the "Alexandra's Kitchen" food blog, I knew right away I'd be making it, and soon!!  How can you resist a recipe with blueberries AND buttermilk?!  I couldn't and turns out I was glad I couldn't.  We put the small in small group that night with only 4 adults and 2 kids.  Regardless, we put a HUGE dent in this dessert.

    Banish the midweek "blues" with this blueberry goodness tonight!!

    Buttermilk Blueberry Cake 
    Ingredients:
    ½ cup unsalted butter, room temperature
    2 tsp. lemon zest or more — zest from 1 large lemon
    3/4 of a cup packed brown sugar
    1 egg, room temperature
    2 tsp. vanilla
    2 cups flour (white whole wheat worked great)
    2 tsp. baking powder
    1 tsp. kosher salt
    2 cups fresh blueberries
    ½ cup buttermilk
    1 tablespoon granulated sugar for sprinkling on top

    Method:
    • 1. Preheat the oven to 350ºF. Cream butter with lemon zest and 3/4 cup of the sugar until light and fluffy.
    • 2. Add the egg and vanilla and beat until combined. Meanwhile, toss the blueberries with ¼ cup of flour, then whisk together the remaining flour, baking powder and salt.
    • 3. Add the flour mixture to the batter a little at a time, alternating with the buttermilk. Fold in the blueberries.
    • 4. Grease a 9-inch square baking pan (or something similar) with butter or coat with non-stick spray. Spread batter into pan. Sprinkle batter with tablespoon of granulated sugar. Bake for 45 minutes. Check with a toothpick for done-ness.  Depending on your oven you may need more or less time.  Start checking for done-ness and desired "golden-ness" (I'm liking the "ness" words today!) at about 35 minutes. 
    • Let cool at least 15 minutes before serving.
    Click here for printable recipe

    Tuesday, May 1, 2012

    The Beauty of Cranberries

    Cranberries are another baking favorite of mine.  The problem with cranberries though.... they are seasonal and one can have the MOST difficult time finding them at any time of the year other than Thanksgiving.  This year I got smart.  When those deals hit the stores selling cranberries 2 bags for $3, I stocked up and froze them!!  Now I can make cranberry whatever, whenever!!  (Let me take a moment to congratulate myself on that spectacular move.............. Ok, done.) 

    I discovered this particular recipe at "JoyofBaking.com" and made a few alterations (I am me after all.)  The result was a gorgeous and delicious shortbread; the perfect accompaniment to a nice hot cup of tea or coffee.  Seriously, the beauty of cranberries once baked is undeniable.  That deep, rich red is simply divine! 

    Once again, I have decided that almost any berry will work here, but the tartness of the cranberry really rounds out the sweet flavor and dryer texture of the shortbread.  It was delectable and enjoyed by all. 

    If you are looking for a great brunch, tea or dessert item that looks as good as it as it tastes, you've found it here!


    Cranberry Shortbread Bars 
    Ingredients:
    **For the Cranberry Filling:
    2 1/2 cups fresh (or frozen!!) cranberries
    3/4 cup of granulated white sugar
    1/8 tsp. ground ginger
    3 Tbsp. water

    **For the Shortbread
    2 cups flour (I used white whole wheat)
    2 Tbsp. cornstarch
    1/4 tsp. salt
    1 cup unsalted butter, at room temperature
    1/3 cup brown sugar - packed
    1 1/2 tsp. vanilla

    Method:
    Pre-heat oven to 375 degrees.  Grease a 9X9 inch pan
    In a medium sized saucepan, combine all the ingredients for you cranberry filling (cranberries, white sugar, ginger & water). 
    Cook over high heat until boiling.  Continue to boil until cranberries become thick.  This should take about 5-7 minutes. 
    Remove cranberries from heat and let cool.
    Cream the butter with a mixer until smooth.  Add the brown sugar and again beat until smooth.  Beat in the vanilla extract.
    In a separate bowl combine flour, cornstarch and salt.
    Add the flour mixture to the butter and sugar mixture, combine gently until the flour is just incorporated.
    Press 2/3 of the shortbread mixture into the bottom of the greased pan. Then spread the cranberry fillin over the shortbread.
    Crumble the remainder of the shortbread dough over the cranberry filling using your fingers.  Then lightly press the dough into the filling.
    Bake for 30 minutes, or until golden brown on top and remove to wire rack to cool.

    Click here for printable recipe

    Monday, April 30, 2012

    Loves me some peaches!

    At the end of last summer my boys and I picked about a thousand pounds (that's not really much of an exaggeration) of peaches with our great friends Anna & Teresa.  We still have quite a frew frozen peaches from that picking extravaganza.  They call to me, often.  They are sweet and juicy and beg to be eaten.  Consequently, when I came across a recipe for "Peaches and Cream Coffee Cake" on the "Tidy Mom" food blog, I knew I must make it.  There is not a single word in that title that doesn't entice me.  I altered it because the original recipe calls for canned peach pie filling.  I had fresh/frozen peaches that I wasn't about to substitute for canned!!  I added a bit of flour to my peaches to thicken them to pie filling consistency and that worked perfectly. I also adore the flavor of ginger with peaches and so added some ginger to my peaches as well. This recipe did not disappoint on any level - simple ingredients, easy to put together, pretty and above all TASTY!!! 

    Enjoy some peachy goodness tonight with your family and friends!!

    Peaches n' Cream Coffee Cake
    Peachy Goodness!!!
    Ingredients:
  • 2-1/2 cups all-purpose flour
  • 1 c. brown sugar, packed
  • 3/4 cup butter, softened
  • 2 eggs, separated
  • 1 cup milk (original recipe called ro heavy whipping cream but I subbed 1% milk)
  • 1/2 tsp salt
  • 1 tsp. cinnamon
  • 1/2 tsp nutmeg
  • 2-1/4 tsp baking powder
  • 3 cups peaches
  • 1/4 tsp. ground ginger (more if you love ginger - I used 1/2 tsp because we really love it)
  • 1-2 Tbsp. flour or cornstarch (depending on what you like to thicken your pie filling with)
  • for icing
  • 1 Tbsp. butter
  • 1 tsp. vanilla
  • 3/4 cup powdered sugar
  • 3-5 Tbsp. heavy whipping cream (or milk)


  • Method:
    • Preheat oven to 350°
    • Mix flour, salt & baking powder together and add in sugar, cinnamon, nutmeg and butter (will be crumbly).  Take out 1 cup and save for topping.

    • Mix egg yolks with milk and add to remainder of flour mixture. Mix until very smooth.
    • Gently fold in egg whites.
    • Pour into greased springform pan - also can make in a 9X13 glass pan (bake at 375 for 45 minutes, but the springform pan is MUCH prettier!!)
    • Mix peaches with ginger and 1-2 Tbsp. flour or cornstarch
    • Spread peaches evenly over top of batter.
    • Sprinkle with crumb mixture.
    • Bake for 55-65 minutes. Until lightly brown on top.
    • Allow to cool for five minutes then remove from pan.
    • Drizzle with vanilla icing.
    For the Icing:
    1. Melt butter in microwave, then add vanilla.
    2. Slowly stir in powdered sugar. (will be clumpy)
    3. Add 3 tablespoons of cream (or milk) stir until creamy and smooth. Add more cream 1 tablespoon at a time until right consistency (runny enough to drizzle over cake).

    Sunday, April 29, 2012

    Sweet & Spicy!

    My friend Stacy and I are always looking for new great ideas for dinner that involve vegetarian fare (well for her more vegan).  I came across these on that most addictive site, Pinterest.  I can't remember if I pinned them first or she did.  It doesn't really matter.  We both made them the same week.  I tweaked a few things because I'm a texture freak.  If it doesn't feel good in my mouth, it doesn't get beyond that point.  It seemed like a fantastic idea to saute the corn in spices first, but I found it made it a bit chewy and I like my corn full and bursting.  Additionally, Stacy and I both discovered that the sweet potato mixture is so creamy and flavorful that the shredded cheese on top in the original recipe isn't necessary at all.  To each her own, but in the following recipe I'll be giving the method I most prefer.  These make a great main dish for those who are into eating a plant strong diet.  I paired them with fresh fruit and a salad and all 3 of my guys were satisfied, even the bottomless pit that is my older son.

    Grab some sweet potatoes and get stuffing!!!

    Stuffed Mexican Sweet Potatoes 
    *Adapted from "Pinch Of Yum" food blog by Stacy & Gretchen
    Ingredients:


  • 3-4 medium sweet potatoes
  • 1 can corn, rinsed and patted dry
  • 1 can black beans, rinsed and drained
  • 1 tablespoon butter
  • 1/2 yellow onion, chopped
  • 1-2 canned chipotle peppers in Adobo sauce, minced or pureed
  • 1 ounce light cream cheese
  • 1/4 cup light sour cream
  • 1 teaspoon salt (+ more to taste)
  • 1/8 teaspoon cumin
  • 1/2 cup cilantro, roughly chopped
  • 6 tablespoons shredded cheese (Pepperjack, Cheddar, Colby Jack) - Optional!


  • Method:

    1. Preheat oven to 350 degrees. Bake the sweet potatoes for 45-60 minutes.
    2. While sweet potatoes are baking, combine corn with a sprinkle of salt and cumin (feel free to add any other Mexican seasoning in the amounts that work for you) in a medium bowl.  
    3. Saute the onion in the butter over medium heat until soft and translucent. Set aside.
    4. Remove sweet potatoes from the oven when fork-tender. Let cool for 5-10 minutes. Cut the sweet potatoes in half. Scrape out the insides of the sweet potatoes out, leaving the skins intact. (as much as possible).  Leaving some of the sweet potato in the skin helps keep the skins whole.
    5. Mix the sweet potato that you've scooped out of the sweet potatoes with the cream cheese, sour cream, chipotle peppers, and salt. You can use a mixer or just a spoon, depending on how soft the potatoes are. When well-mixed, gently stir in the black beans, roasted corn, sauteed onions, and cilantro.
      I could eat this all by itself!!
    6. Scoop the filling into the skins and top each with 1 tablespoon shredded cheese. Broil for about 5 minutes or until cheese is melted. 
    Before the oven


    Saturday, April 28, 2012

    Heavenly Blueberries

    I've taken a bit of a vacation from blogging; not by design, just by necessity.  The end of the school year sees an increase in referrals for speech and language services and that means testing and paperwork galore.  I haven't been able to find moments to blog but I have CREATED moments to bake.  It's my stress relief and a necessity when the end of the school year rolls around.  Luckily I have a great excuse, my small group Bible study.  I HAVE to provide yummy treats for them each week.  Not because they make me, but because I need to.  It provides the perfect reason to drop everything and bake.  A few weeks ago my younger son joined me in the kitchen to create some of the tastiest treats yet. Living in the Yakima valley for the past almost 2 years, we've discovered a treasure trove of fresh fruit, ours for the picking, literally.  We have taken full advantage of all opportunities and with the help of my canning equipment and a large garage freezer; we've been able to enjoy the "fruits of our picking labor" all year round.  For this recipe I grabbed some of the amazing blueberries we picked last summer. (I have since decided that almost any berry would be great in this recipe.) We went blueberry picking with some great friends and my obsessive compulsive side reared its head.  I could not pull myself away as long as there was a single berry left on a bush.  My husband had to intervene.  I dreamt of picking berries that night.  I digress.  The original recipe comes from The Smitten Kitchen food blog.  I really didn't change much since it is such a simple, straight forward recipe that there was no need.  In fact, my 4 year old kitchen helper did much of the work.  (He is, however, a trained professional, enrolled for the past 5 months in his pre-school's cooking class.)  Don't let the simplicity fool you though.  It looks and tastes completely AMAZING!!!  I made a second dessert on top of this one.  There was one small piece left by the end of the night.  There were only 9 people at small group!!!  If that isn't a testimony to the sheer deliciousness of these bars, nothing is. 

    Grab some berries and getting cracking on this pan of deliciousness.

    Blueberry Crumb Bars  
    Ingredients:
    3/4 cup white sugar (I cut this down from 1 cup - hey, every little bit helps right?)
    1 teaspoon baking powder
    3 cups all-purpose flour
    1/4 teaspoon salt
    Zest and juice of one lemon  (thinking of trying lime next time)
    1 cup cold unsalted butter (2 sticks or 8 ounces)
    1 egg
    4 cups fresh blueberries
    1/4 cup white sugar  (also cut this in half because I knew these blueberries were sweet already)
    4 teaspoons cornstarch

    Method:
    1. Preheat the oven to 375 degrees F (190 degrees C). Grease a 9×13 inch pan.
    2. In a medium bowl, stir together 3/4 cup sugar, 3 cups flour, and baking powder. Mix in salt and lemon zest. Use a fork or pastry cutter to blend in the butter and egg. Dough will be crumbly. Pat half of dough into the prepared pan.
    My happy little helper!

    Grinning Fiendishly

    Working hard

    3. In another bowl, stir together remaining 1/4 cup sugar, cornstarch and lemon juice. Gently mix in the blueberries. Sprinkle the blueberry mixture evenly over the crust.
    He has to get is perfectly even.
    4.  Crumble remaining dough over the berry layer.
    Seriously cute kitchen elf
    Up close look before the oven.
     Makes me want to eat it now!

    5. Bake in preheated oven for 45-60 minutes, or until top is slightly brown. (It took a full hour in my oven to reach desired color.)


    Click here for printable recipe

    Sunday, April 8, 2012

    Close your eyes, take a bite and say "Wow"!

    This blog is about the dinner I made for tonight, Resurrection Sunday. I like to do things that are unexpected, out of the norm, sometimes.  Soooo.... no ham, no potatoes, no traditional foods.  I made a a lasagna with roasted sweet potatoes and butternut squash. One word, A-MAZE-ING!  I literally closed my eyes while I chewed. It enhanced the experience by about tenfold!  It's creamy, bursting with flavor, with some texture to chew provided by the noodles and the oh-so-wonderful crusty cheese atop this wonderment.  Fair warning, this is NOT one of my healthier dishes, in fact I'd call it down right indulgent.  Its saving grace is the good amount of orange vegetables in it.  I cling tightly to that fact right there.  I clung to it though each and every delectable bite tonight.  This WILL become one of my all time, top comfort foods.  But, back to business.  The original recipe comes from the food blog "How Sweet It Is" and it called for a few things I didn't have, which absolutely forced me to improvise and make it more my own. I think I'll improvise even more next time, substituting fresh basil for the sage because fresh basil is one of my all time food best friends.  I love it and I think it would make this dish just one notch closer to perfect and in my taste it is very nearly there already!!! 

    So, sometime soon, spend some time making this delightfully delicious dish and then sit down, close your eyes, take a bite and..... I bet you say "wow"!!!

    Roasted Sweet Potato & Butternut Squash Lasagna 
    Ingredients:
    9 whole wheat lasagna noodle sheets
    1 medium butternut squash, peeled and cubed (about 3 cups cubed)
    2 medium sweet potatoes, peeled and cubed (about 1 1/2 cups cubed)
    4 ounces cream cheese
    4 ounces sour cream
    4 ounces cottage cheese  - or in place of the cream cheese, sour cream & cottage cheese, you can use 12 ounces of mascarpone cheese but I didn' t have this, thus the improvised list of substitutes
    3 tablespoons unsalted butter
    1 shallot, thinly sliced
    3 cloves of garlic, minced or pressed
    1 1/2 cups freshly grated Parmesan cheese
    1/2 cup freshly grated mozzarella cheese
    1 teaspoon salt
    1 teaspoon pepper
    1/4 teaspoon nutmeg
    1 Tbsp. ground sage OR 15-20 fresh basil leaves!! (Original recipe calls for sage leaves, but I had ground sage from our sage plant from last year and used that instead.)
    olive oil for drizzling

    Method:
    1.)  Preheat oven to 350 degrees F.
    2.)  Cook pasta noodles according to package directions or use "no boil" noodles.
    2.)  Peel and cube butternut squash and sweet potatoes.  Place them on baking sheet.  Drizzle olive oil over the tops.  I used my handy dandy oil spritzer from Pampered Chef and it made this a snap.  Then sprinkle with the nutmeg and 1/2 tsp. salt and 1/2 tsp. pepper.
    I love these colors!

    3.)  Bake the squash and sweet potatoes for a total of 1 hour, turning every 15 minutes to get a nice roasted look on all sides.
    4.)  While the sweet potatoes and squash bake, slice the shallots and mince the garlic. 
    5.)  Heat a medium skillet, add butter then shallots and garlic.  You want to brown the butter but not burn it.  Stir quickly every 30 seconds or so and let the  shallots and garlic saute in the butter for about 2-3 minutes.  Then remove from heat.
    6.)  Stir together your sour cream, cream cheese and cottage cheese.  Add 3/4 cup of the Parmesan cheese.
    This stuff smells and tastes incredible!!
    7.)  Stir in the shallot, garlic, butter mixture until smooth.
    That's some yummy goodness folks!
    8.)  When potatoes are done, mash them either with a fork or mixer - depending on what texture you prefer, just mash them enough that they spread easily over the noodles.
    9.)  Now it's time to layer.  Spray an 8X8 pan with oil.  Put down 1 layer of noodles.  Cover the noodles with 1/2 of the sweet potato/squash mixture and spread out evenly.  Top with 1/2 of the cheese mixture, 1/3 of Tb. of ground sage/sage leaves/basil leaves (which ever you choose) and then 1/2 of the mozzarella and remaining Parmesan.  Add another layer of noodles, the rest of the sweet potato/squash mixture, the rest of the cheese mixture, sage/basil, and another 1/3 of the mozzarella and remaining Parmesan.  Finally put on one last layer of noodles and then cover with the remaining 1/3 mozzarella and Parmesan. top with sage or basil.
    Pretty!
    Layers through the glass pan.


    10.)  Bake at 350 degrees for 45-50 minutes.
    Before diving into it!


    Enjoy!


    Click here for printable recipe